Best Affordable Electronic Load – Kunkin KP184 Review | Voltlog #299

Welcome to a new video, this will be a review of a new test instrument I discovered, you know I like electronic loads and I’ve tested a bunch of hobby grade electronic loads in the past, these were sub $50 items and that budget also meant they had some disadvantages like limited power, limited reliability, limited connectivity, limited functionality and limited accuracy. You were basically trading off a bunch of stuff to be able to get a cheap affordable electronic load.

This is the Kunkin KP184 and I believe this will be a game changer for those who are looking to get something a bit more professional but are still limited by budget and they can’t go for the better instruments starting at 500 USD. The unit is delivered in a large box with nice padding protection and inside you get the instrument, a user manual and a few accessories like some spade connector, an RS232 cable and some wiring.

Let’s talk a bit about the specs of this unit, I have the KP184 model which is like their better equipped model, it works with both 110 and 240VAC, the load voltage can be a DC voltage between 1 and 150V, up to 40A, up to 400W. Measurement accuracy is 0.05% + 5 counts for both current and voltage with 1mV and 1mA of resolution, we’ll be verifying that later. There is RS232 and RS485 connectivity with a modbus protocol which is specified in the user manual and there is a piece of software for the PC, you have to obtain it from the manufacturer which doesn’t respond to emails but I’ve managed to source it and I’m gonna put a link to this in the description below the video and I’ll try to connect it towards the end of this video.

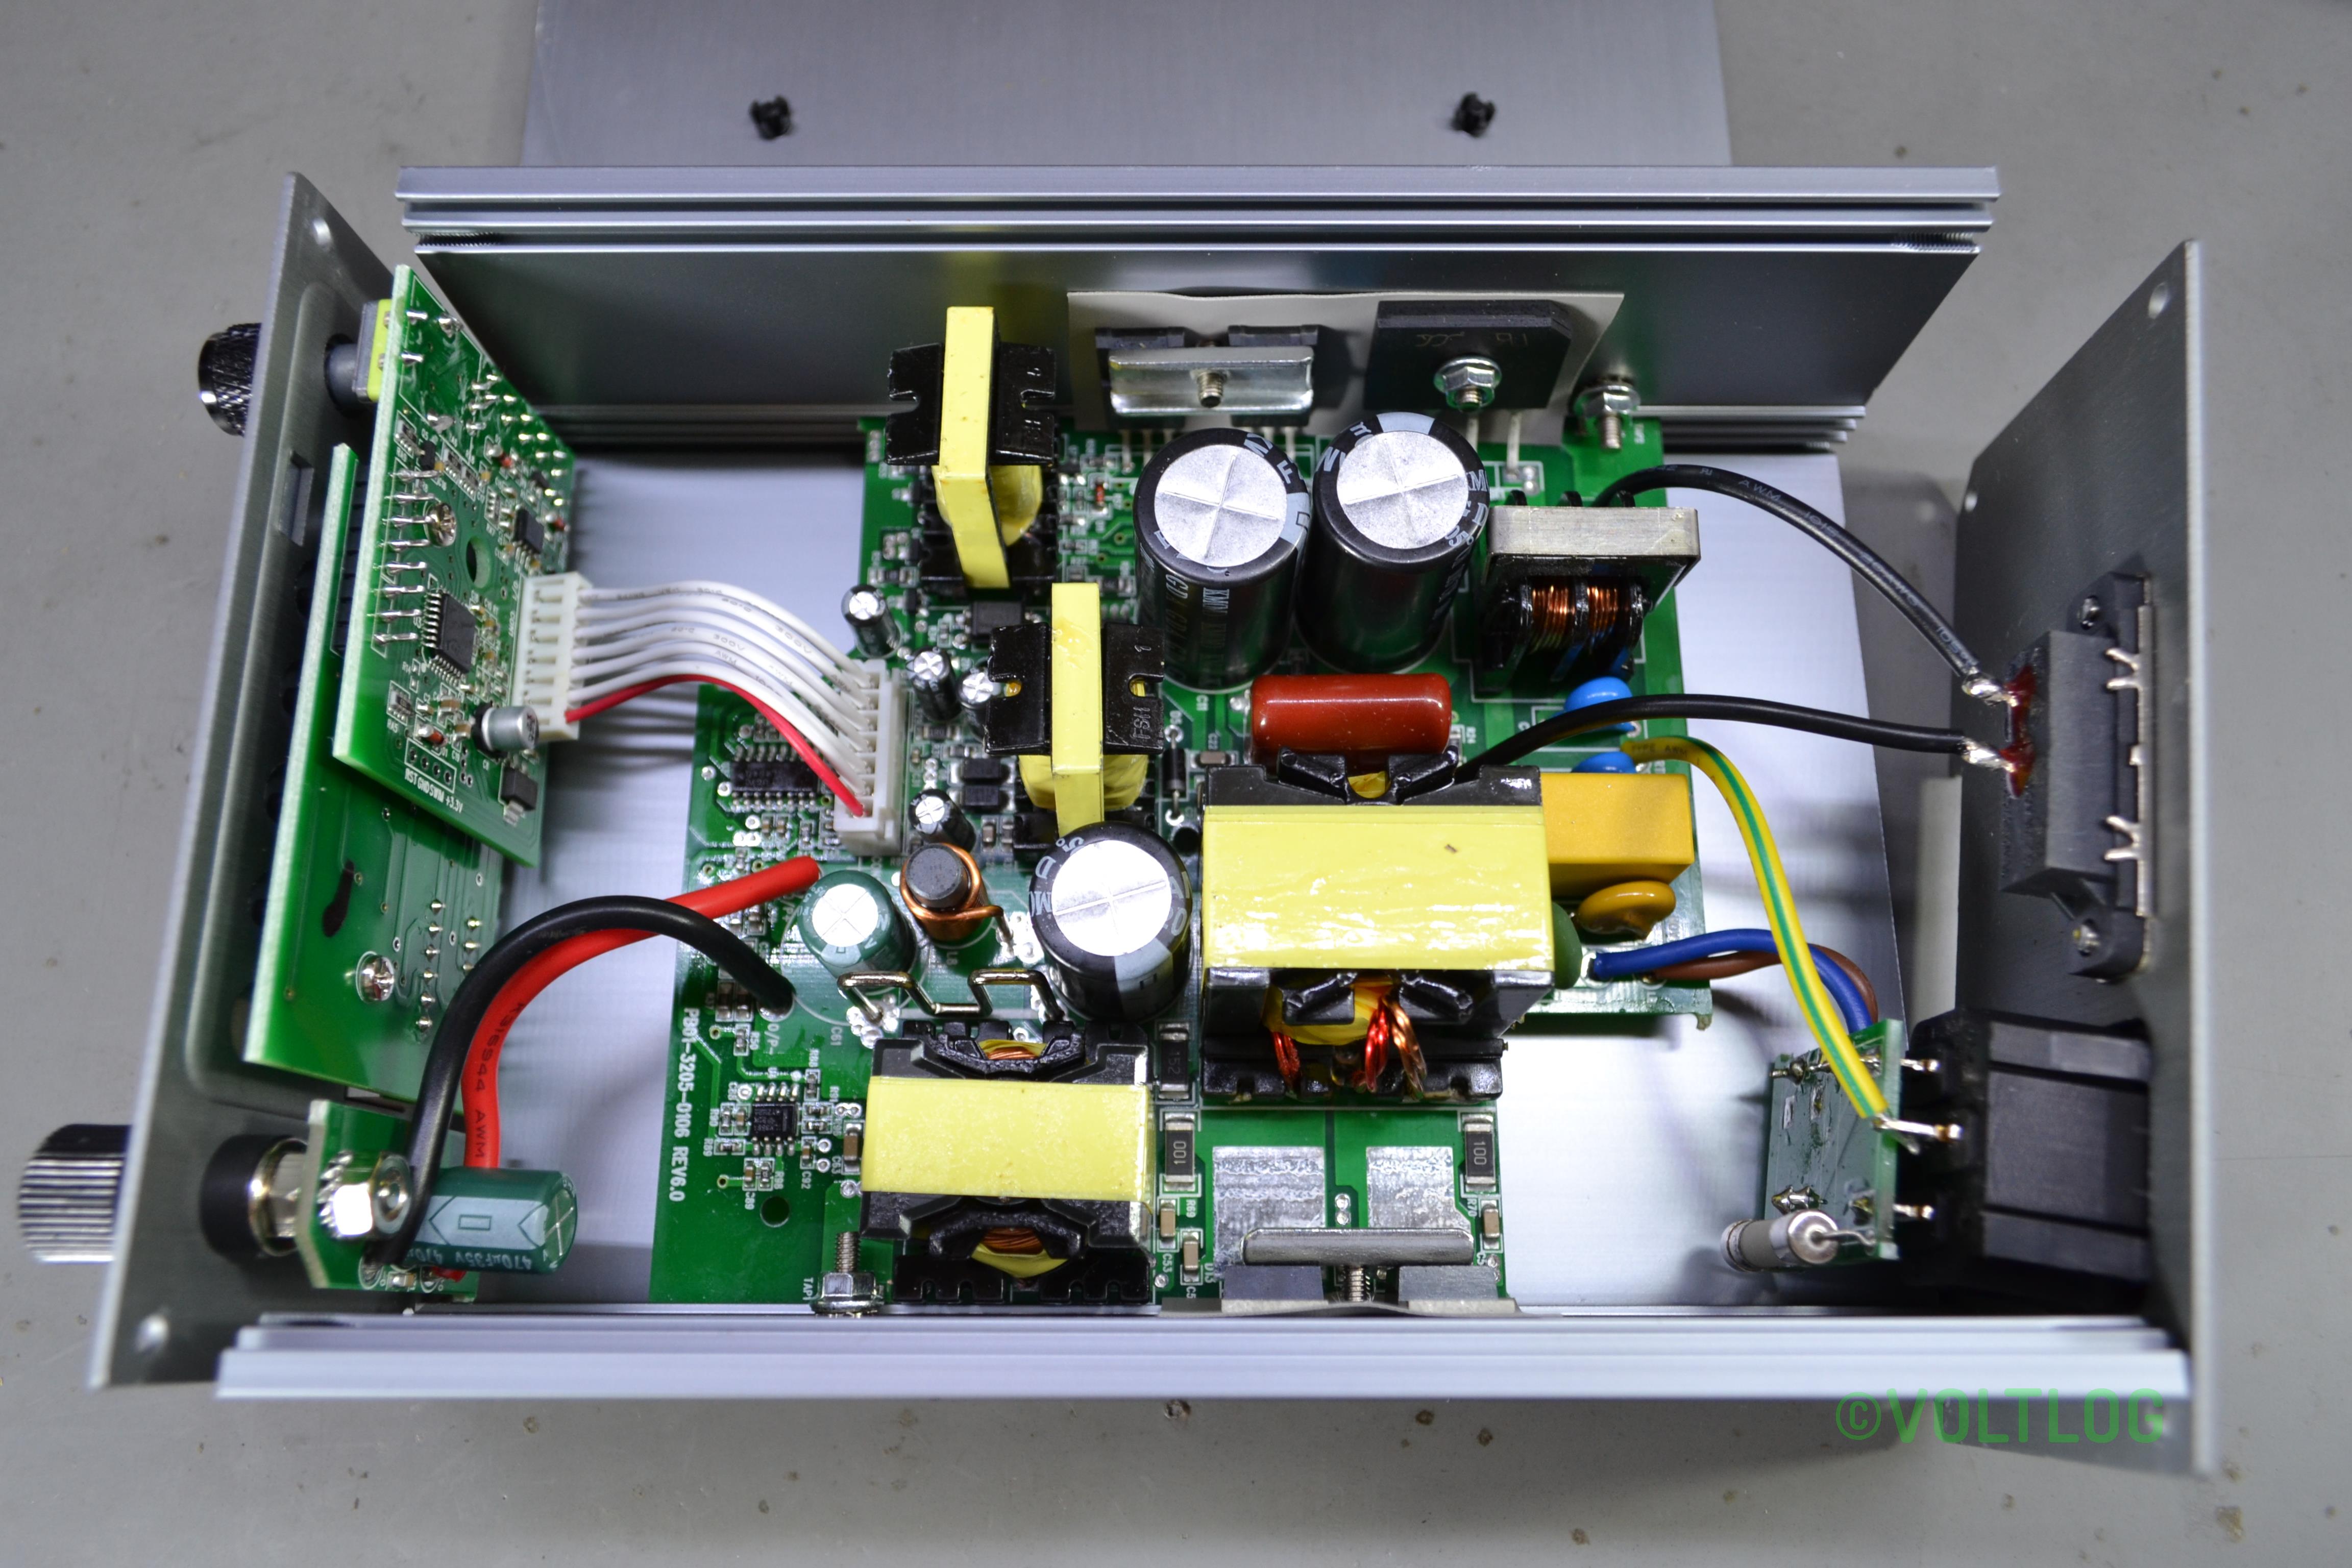
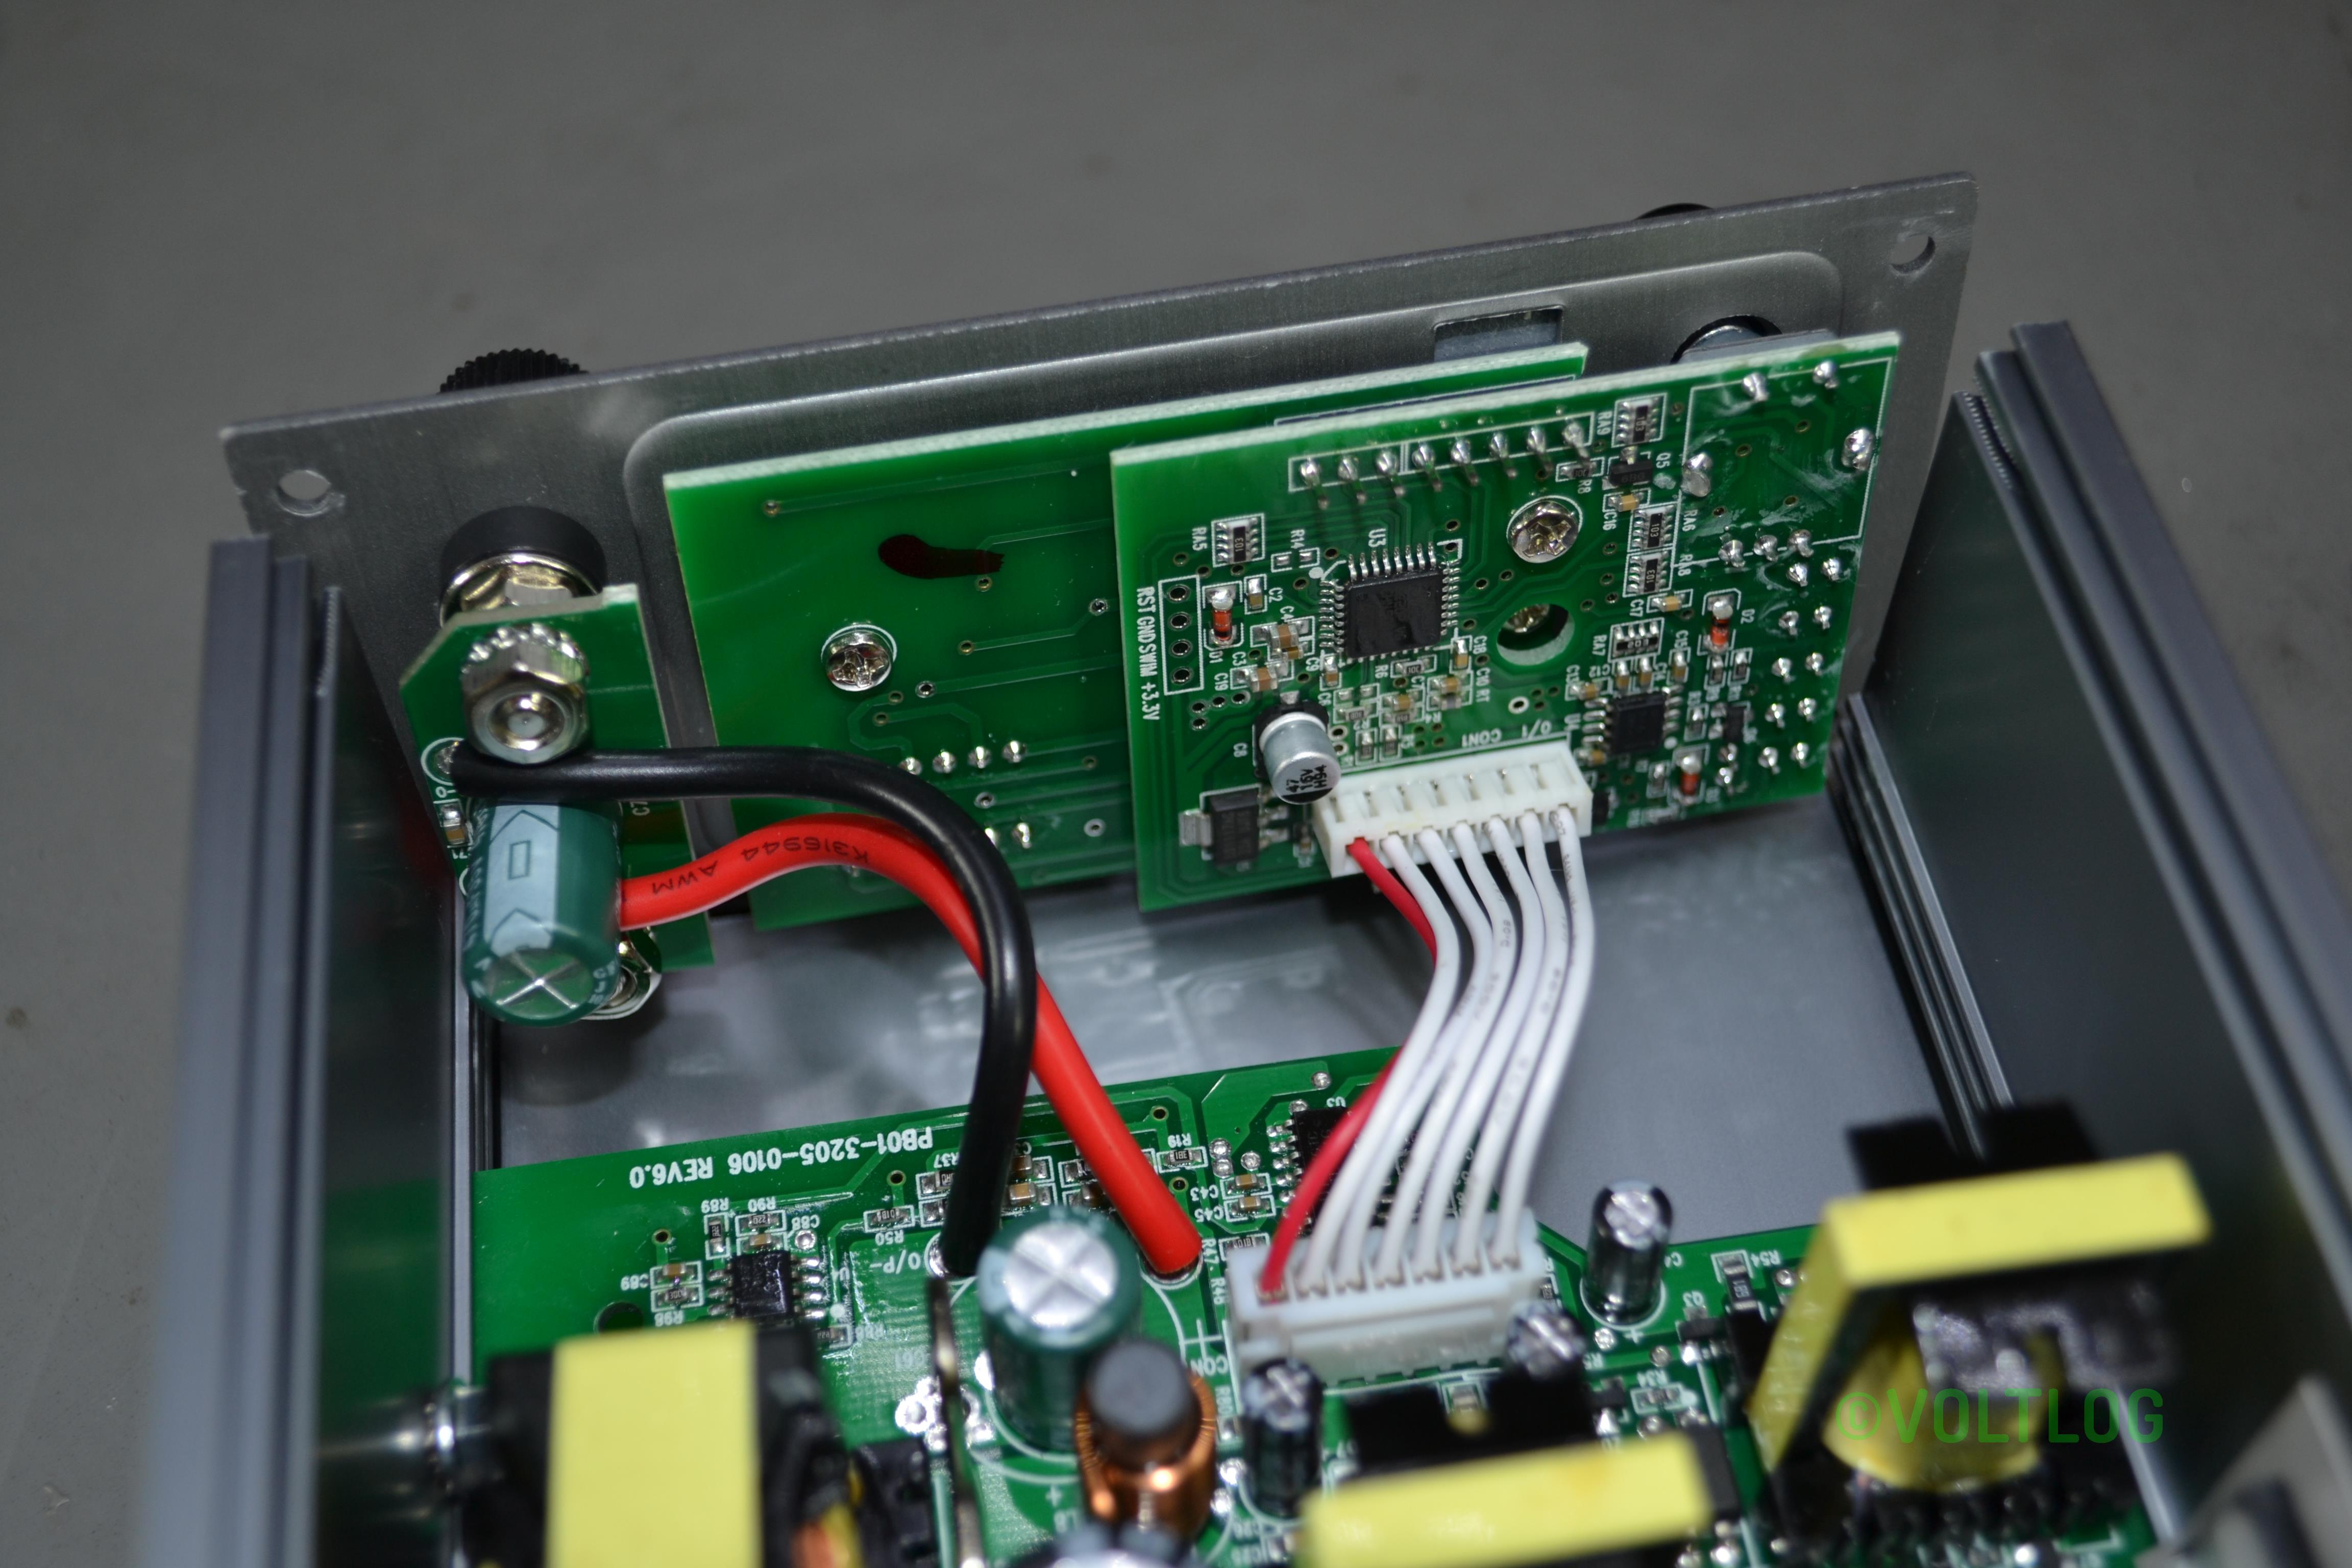
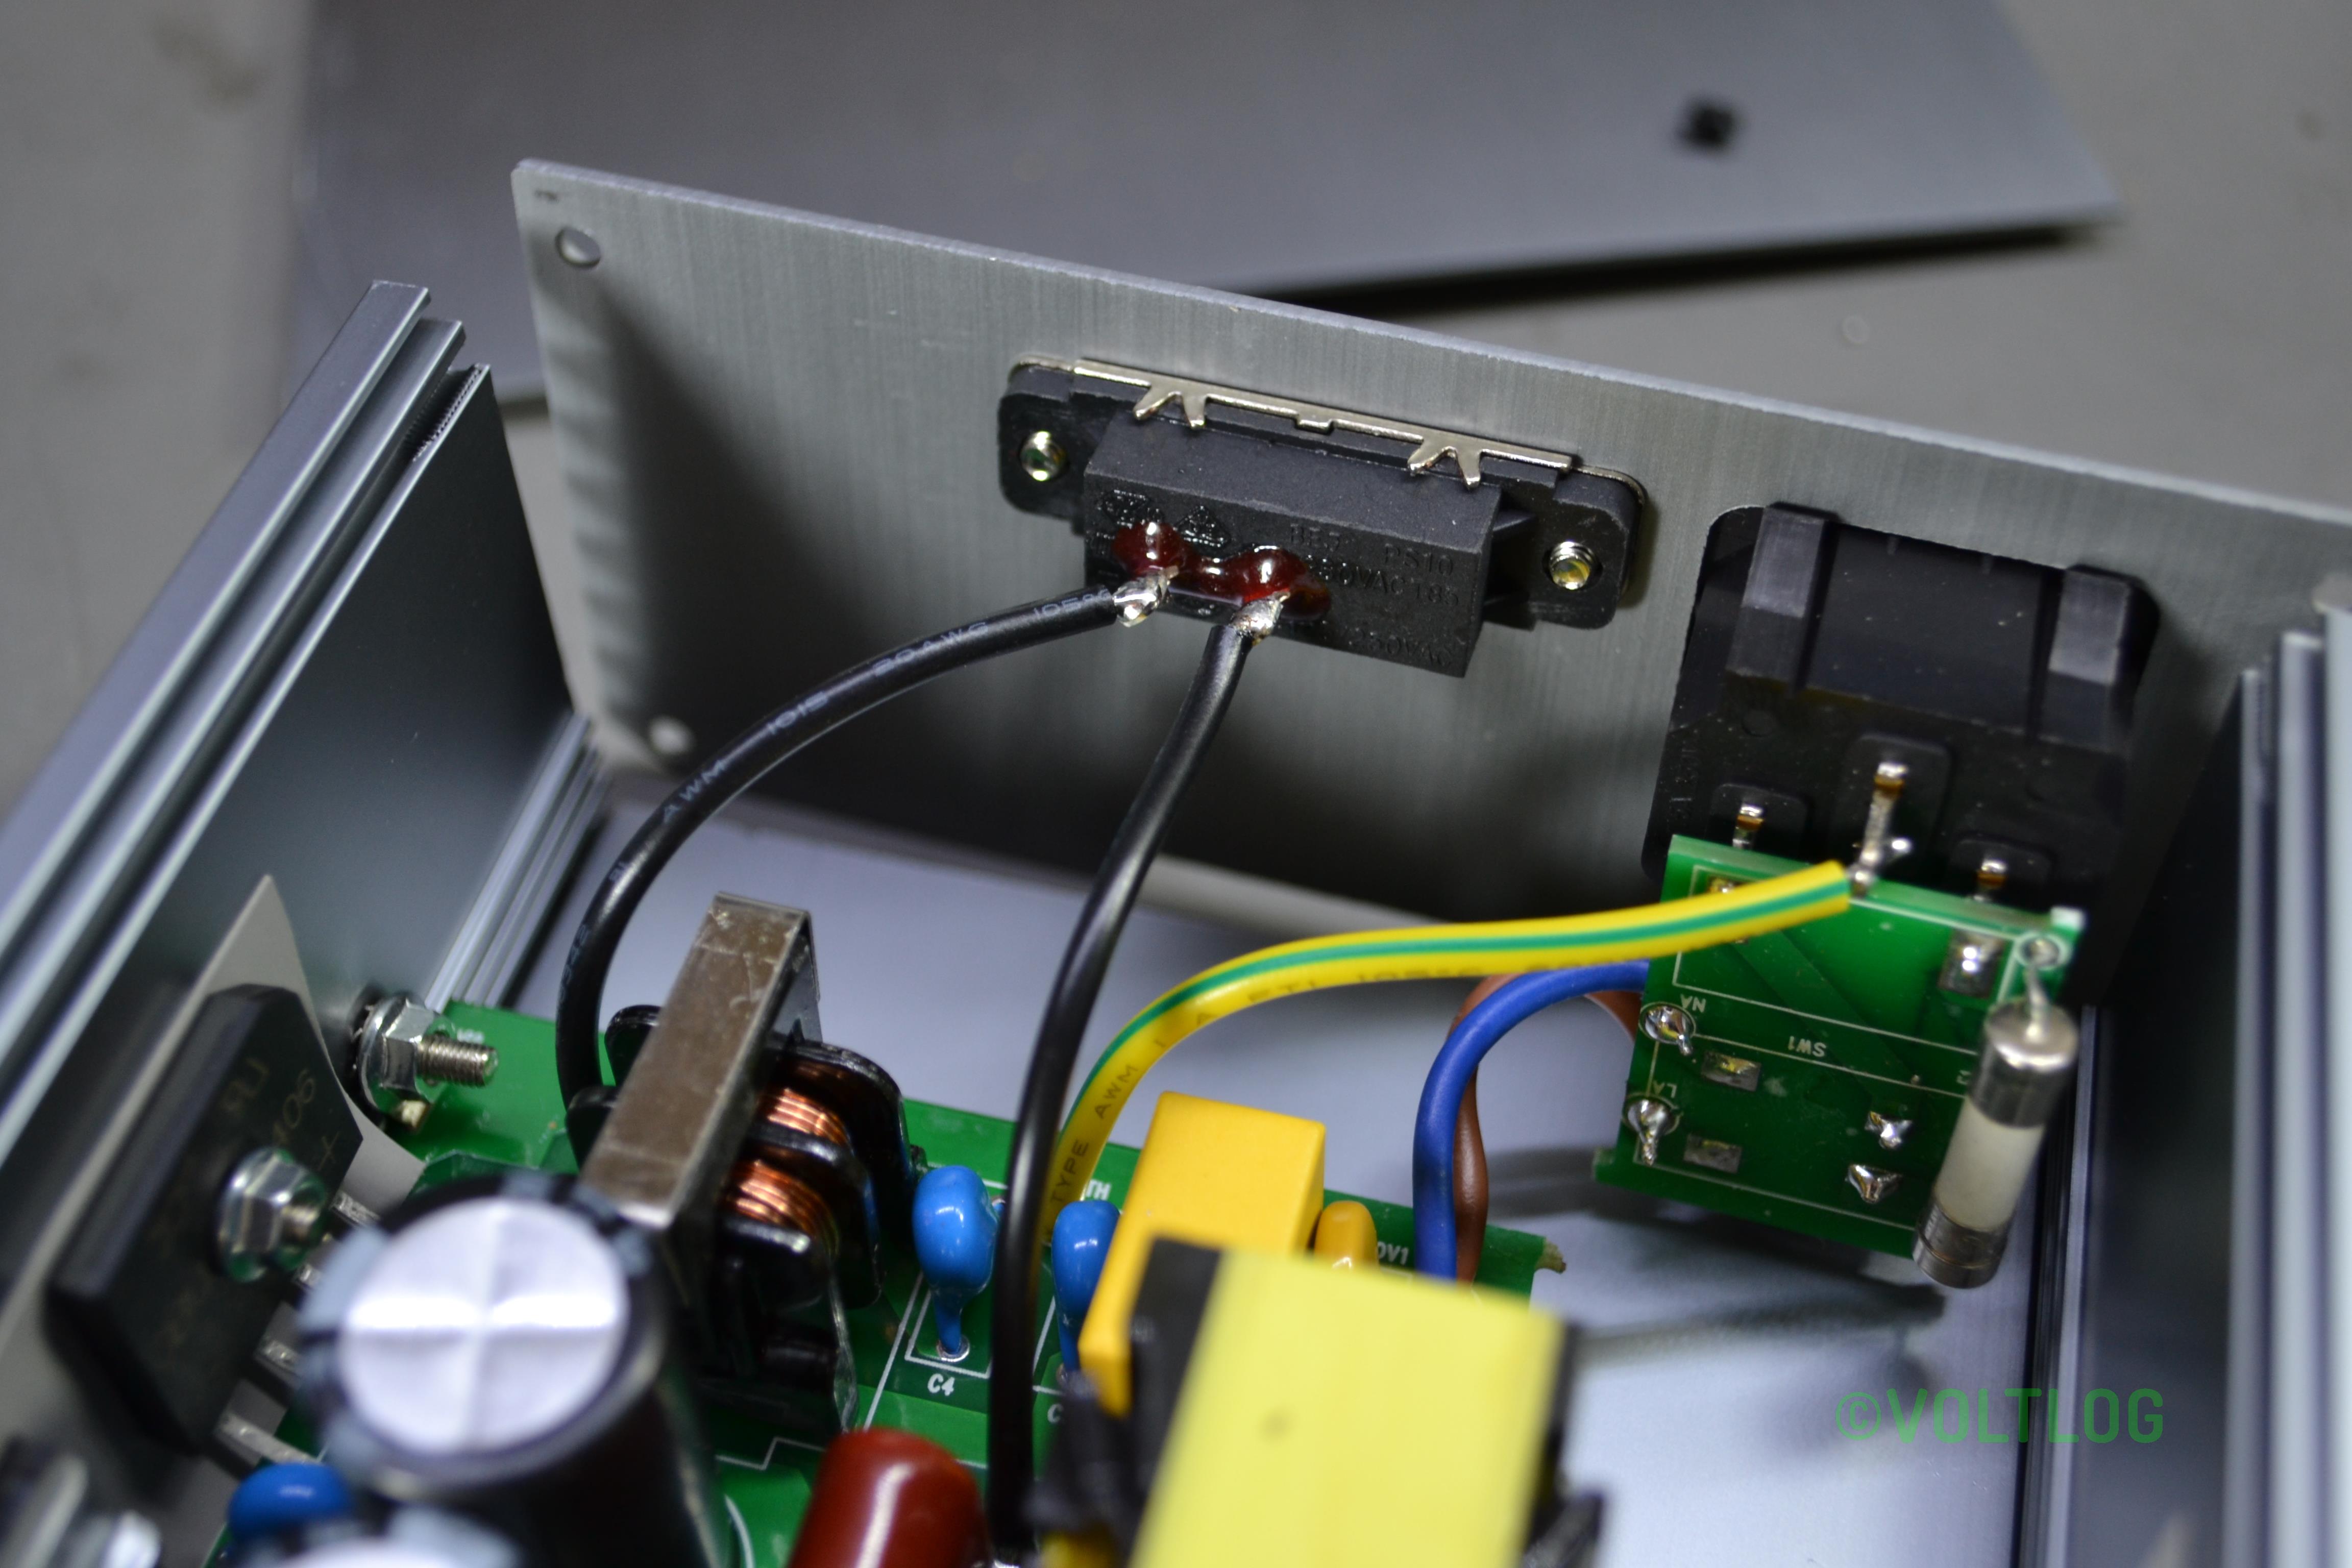
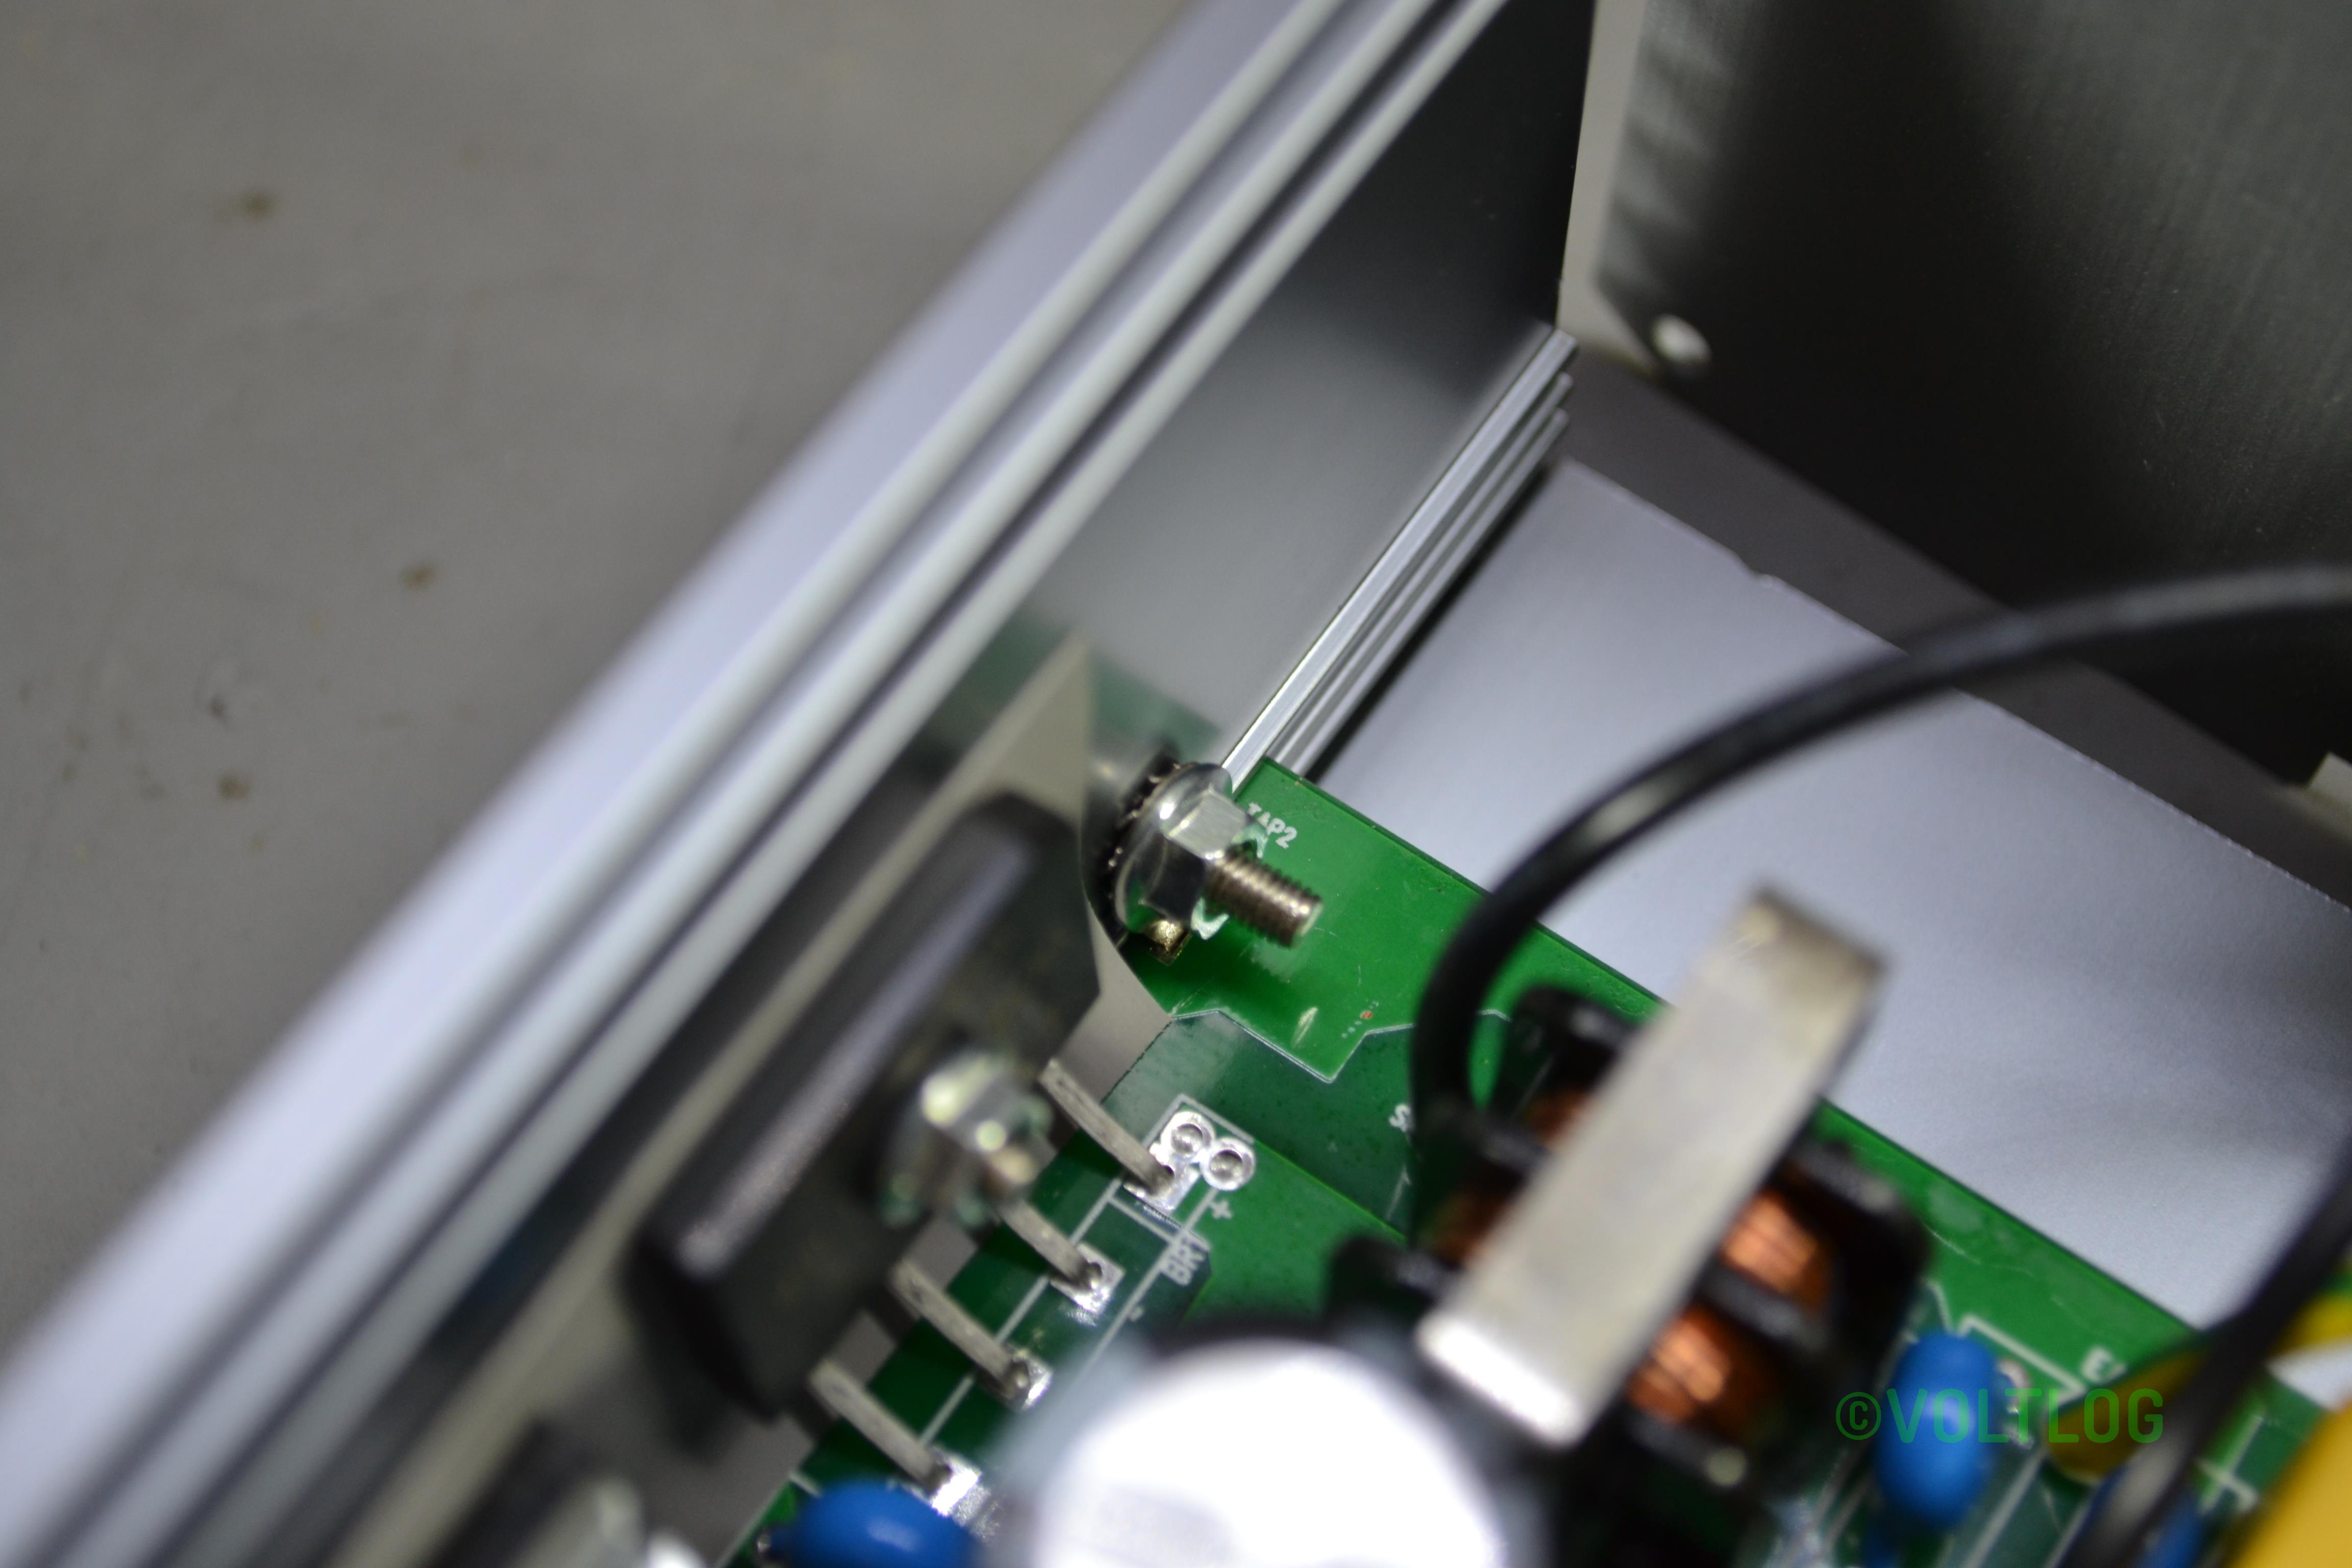
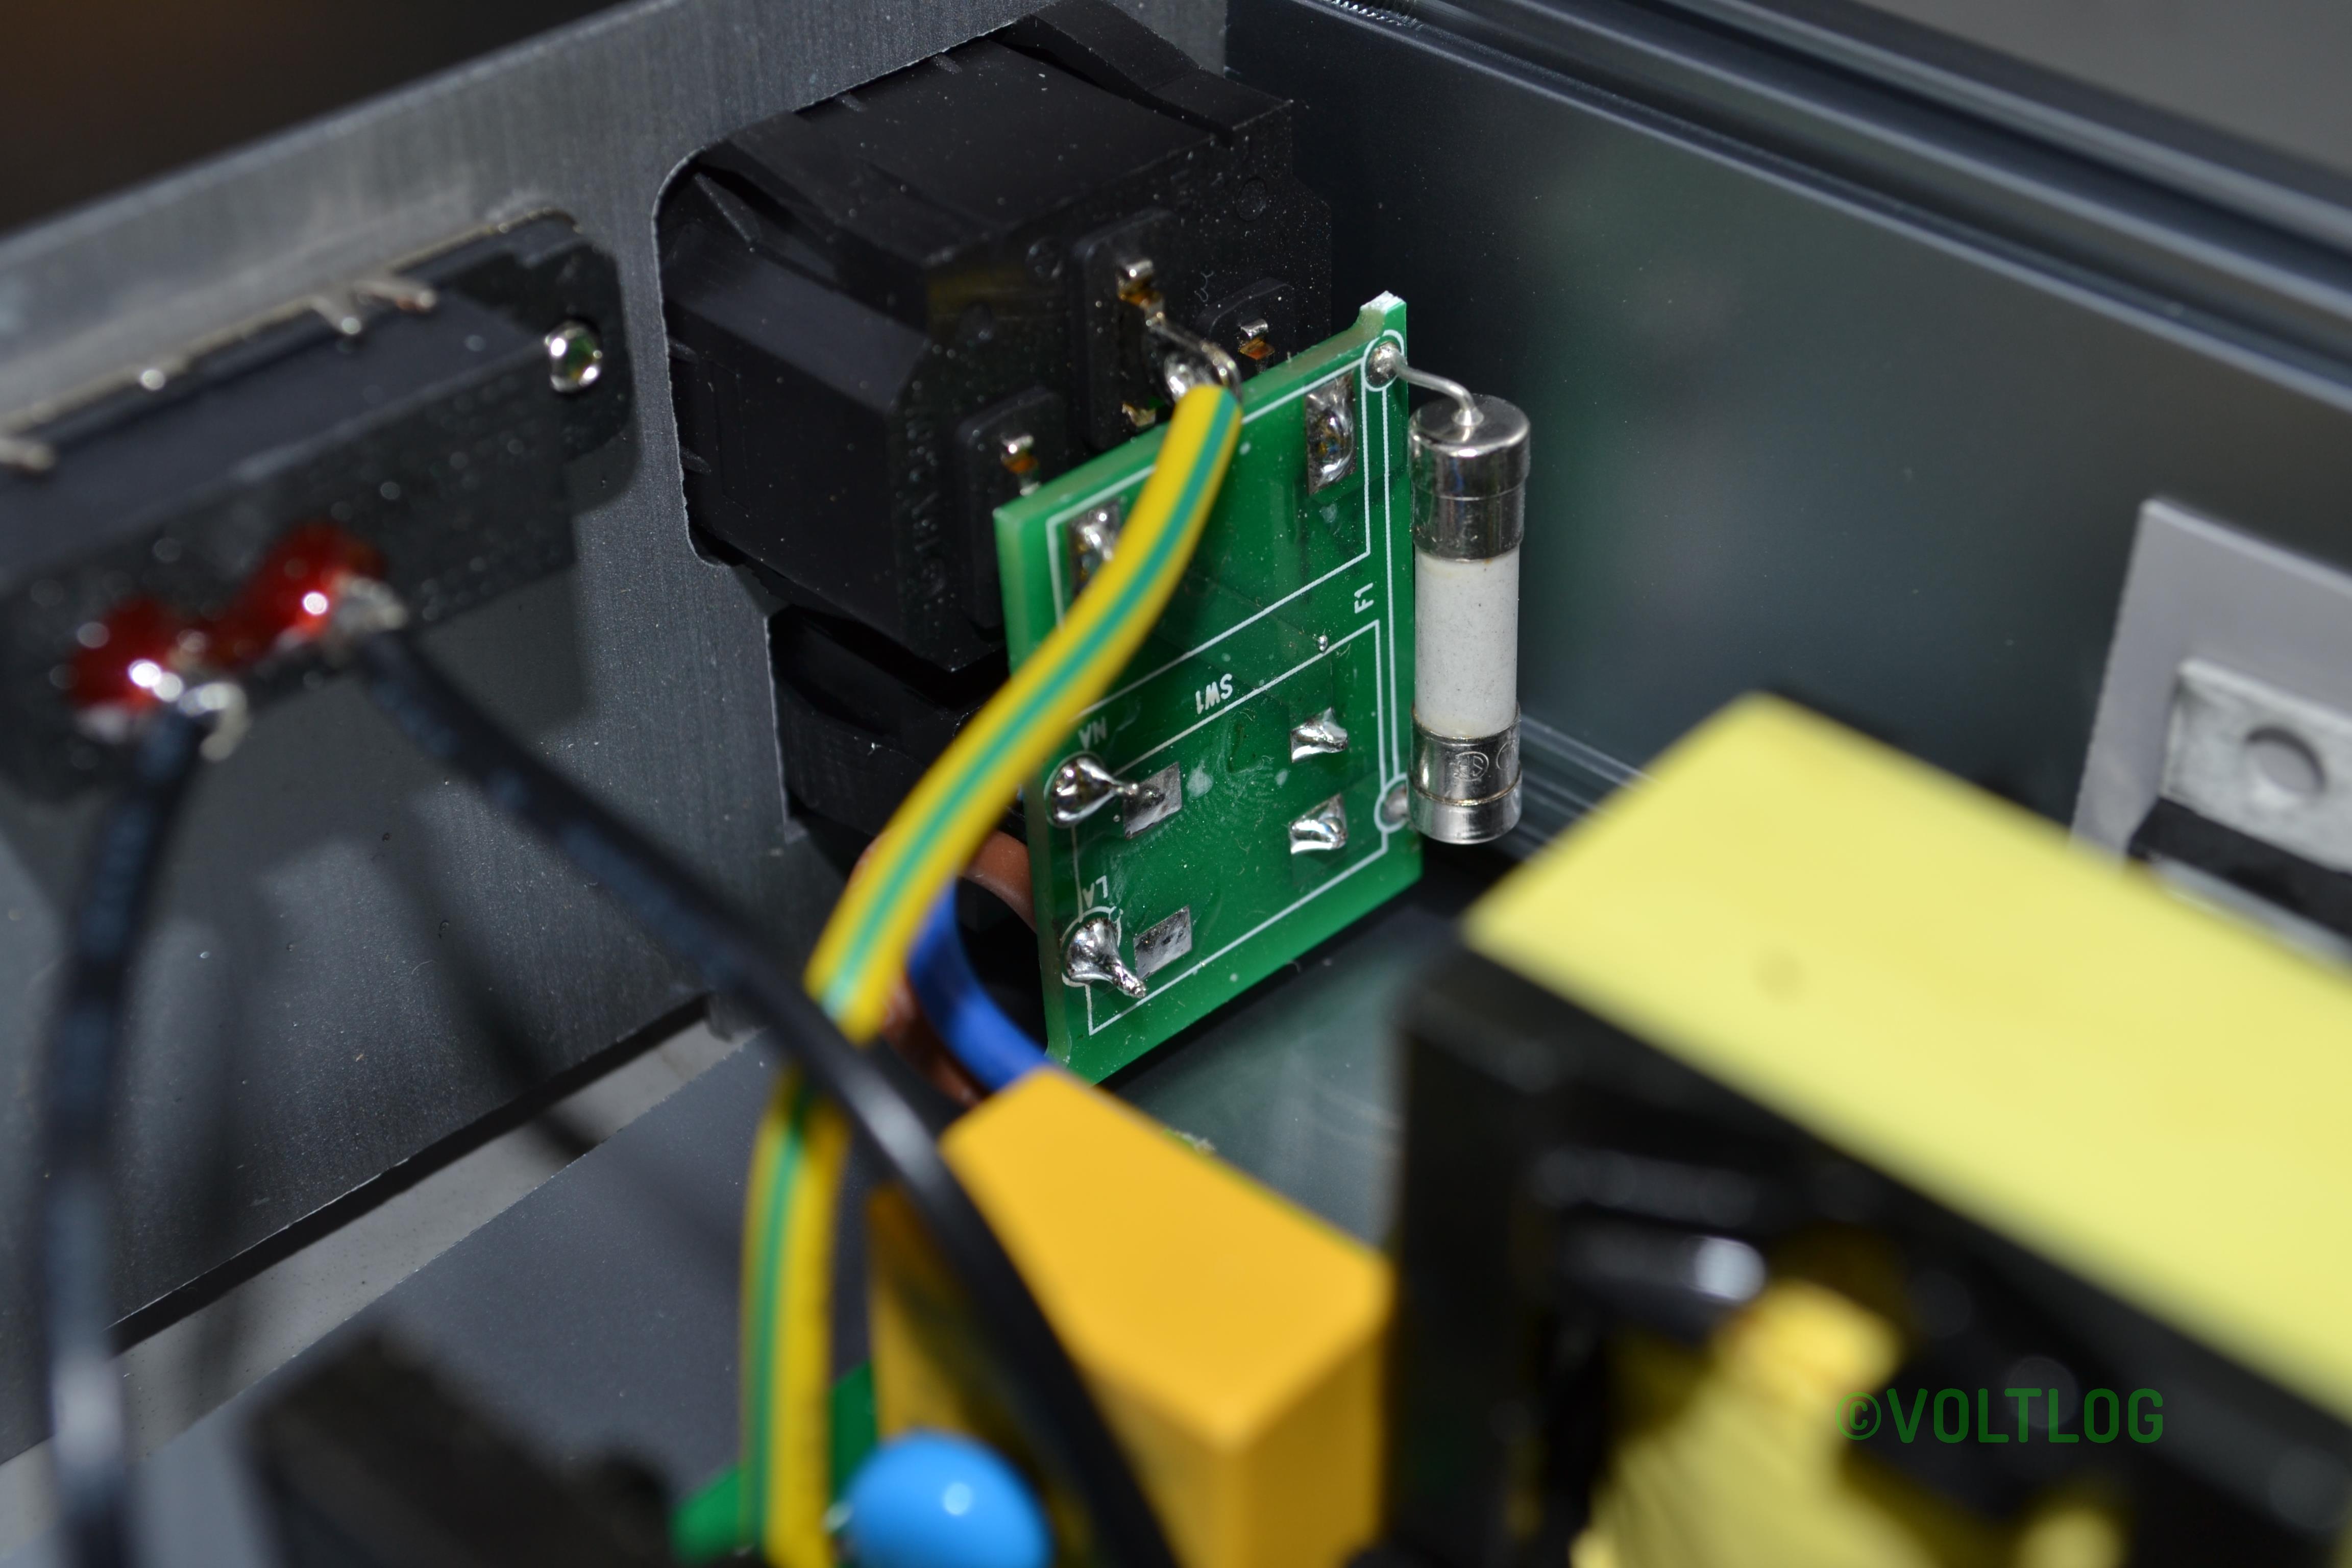
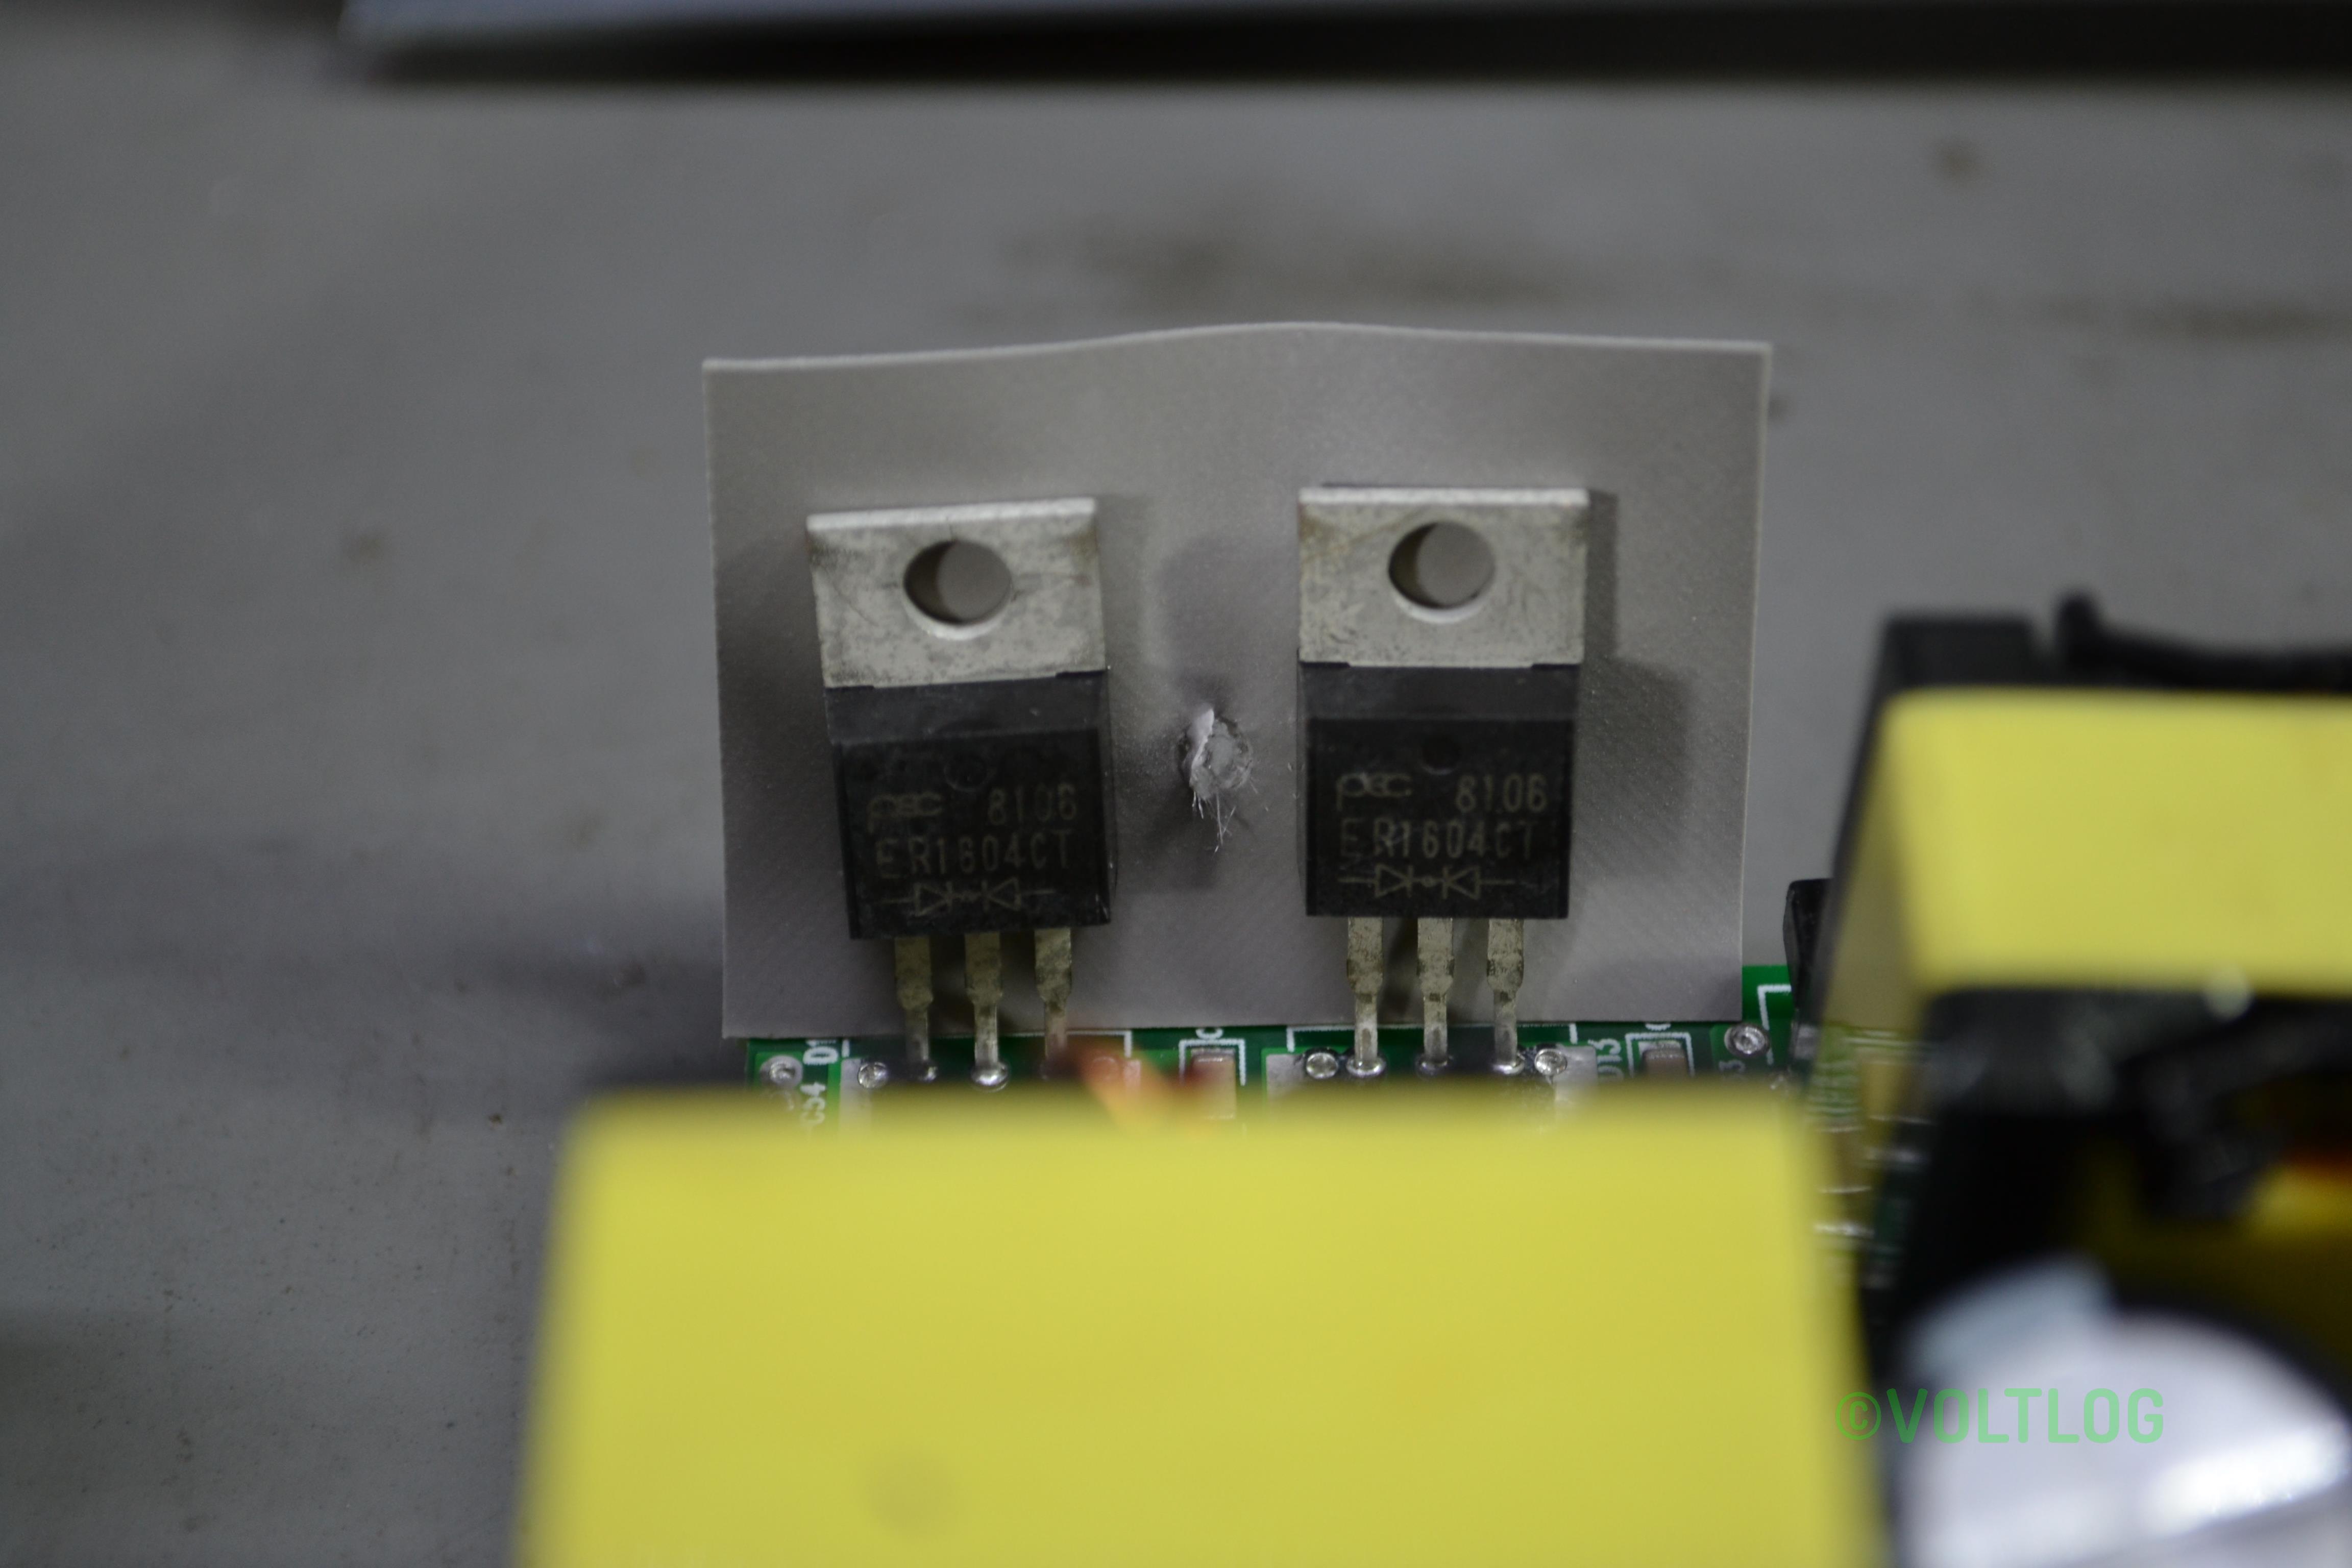
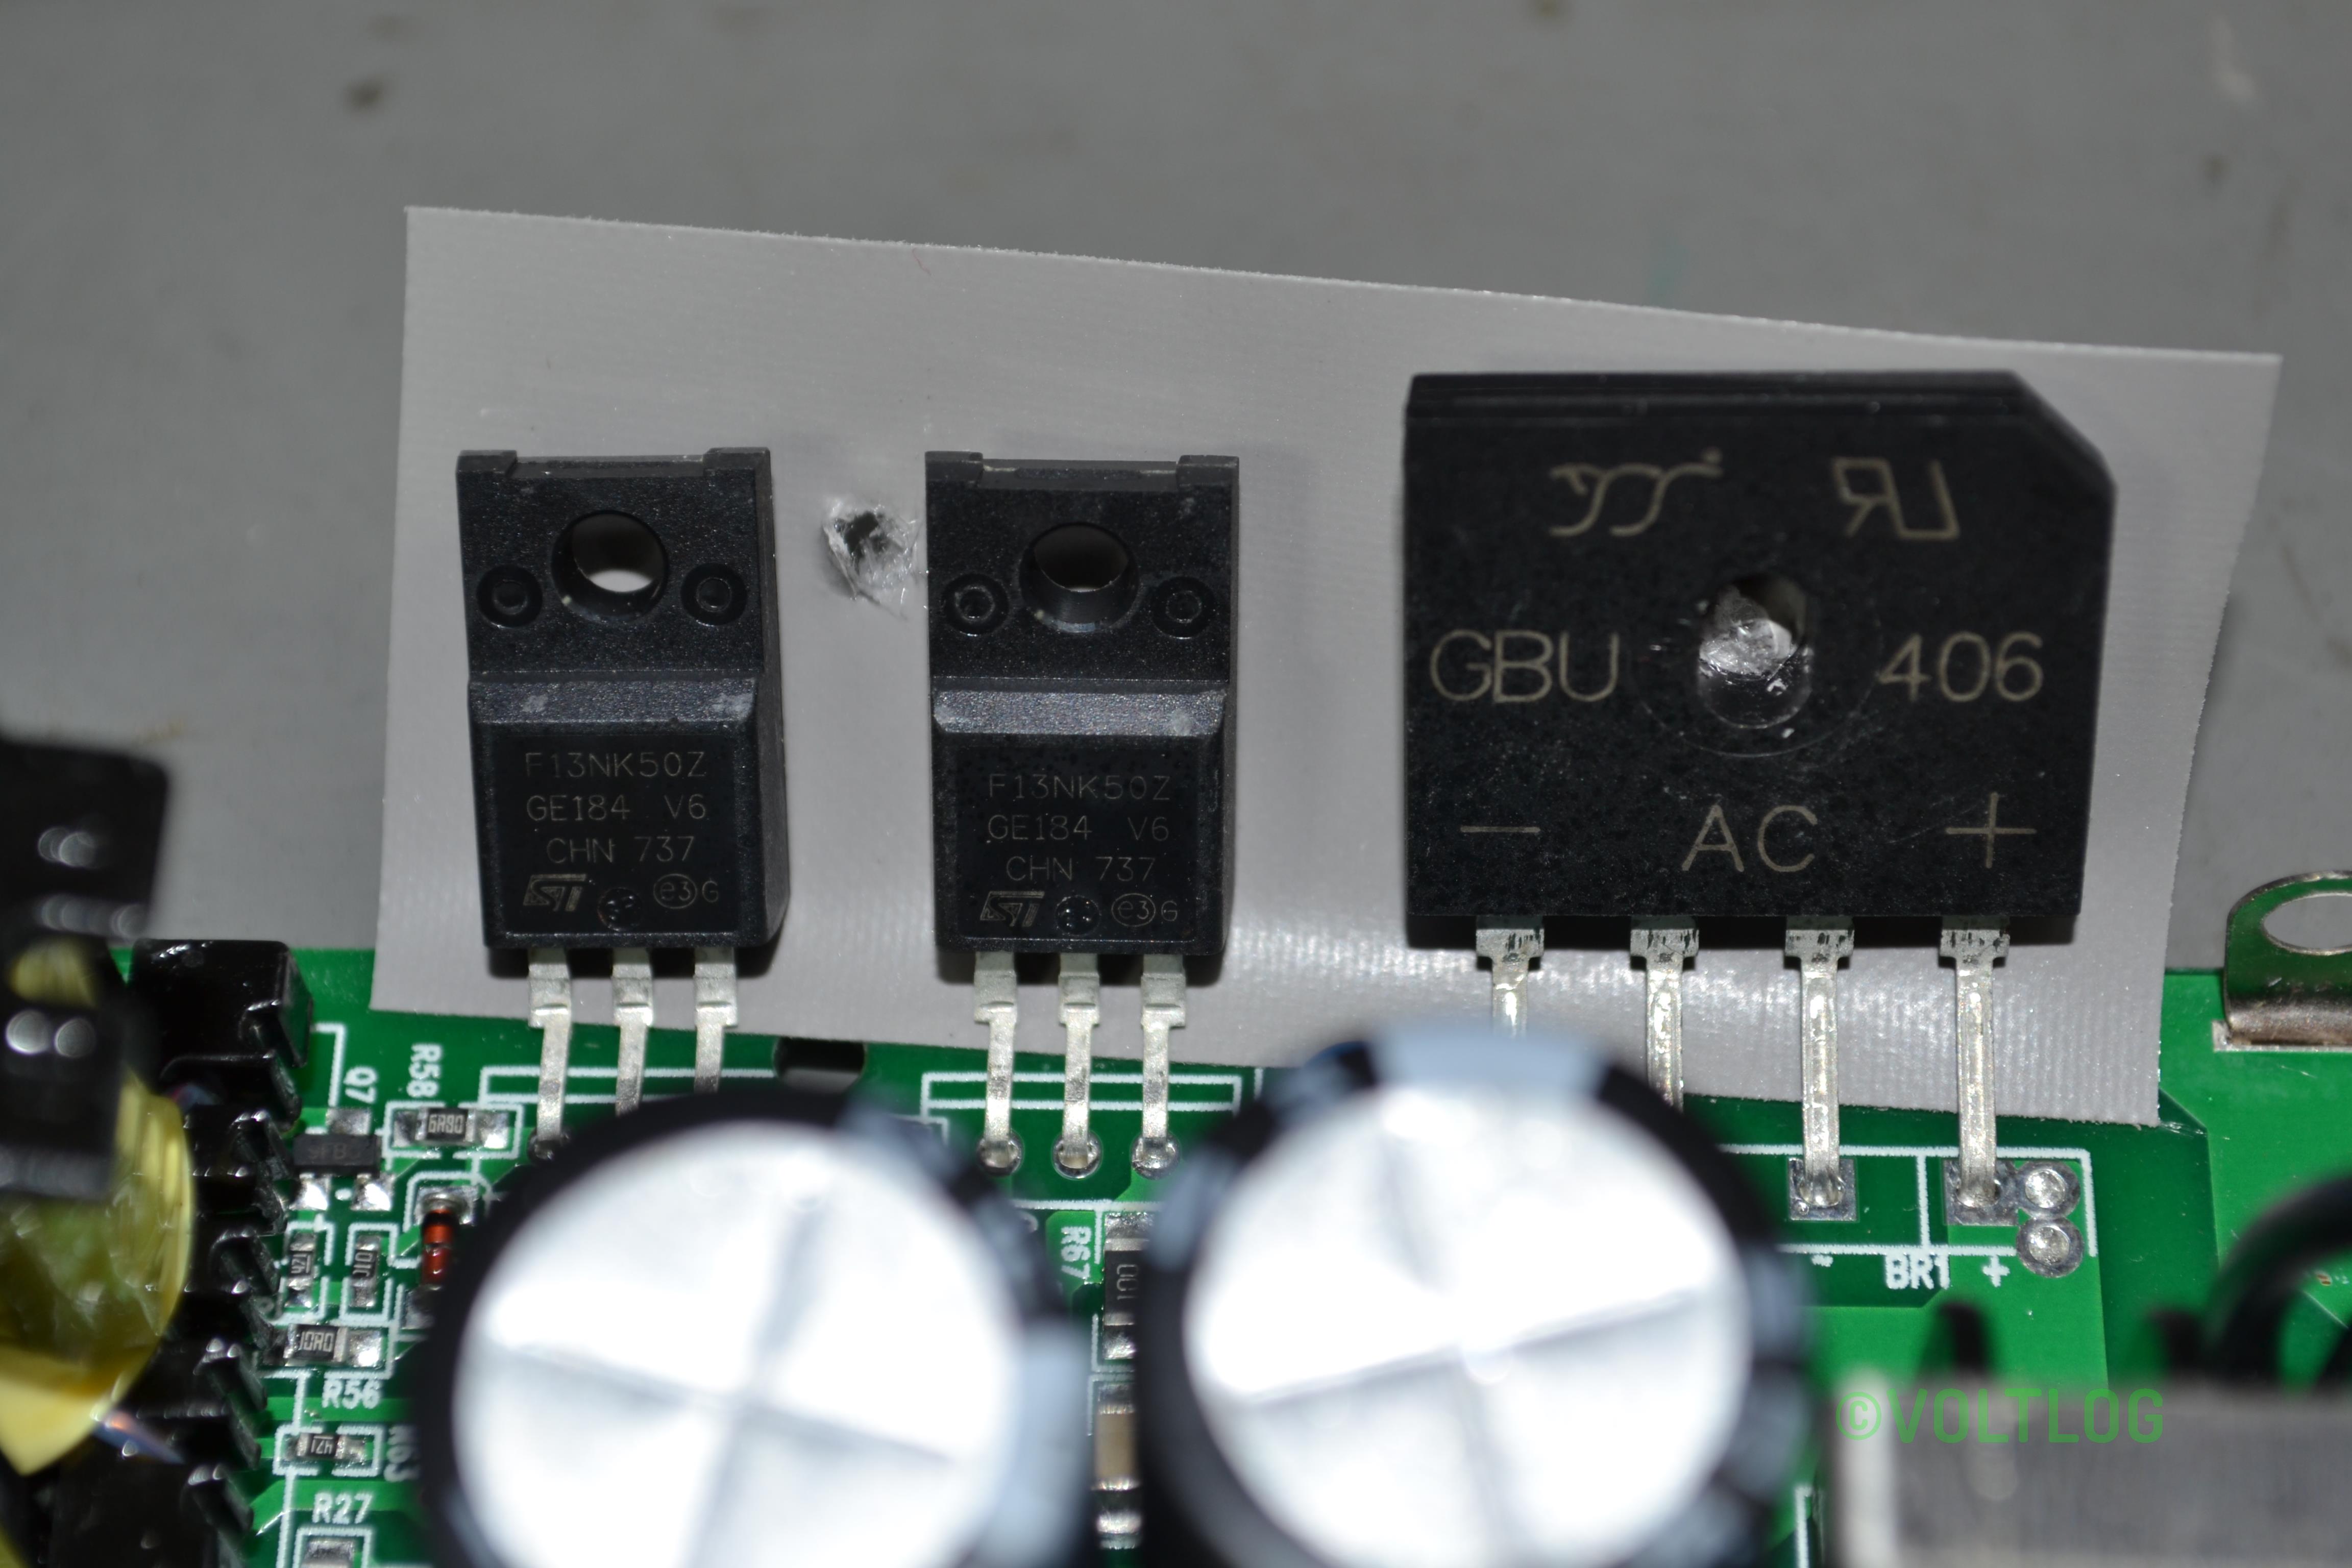
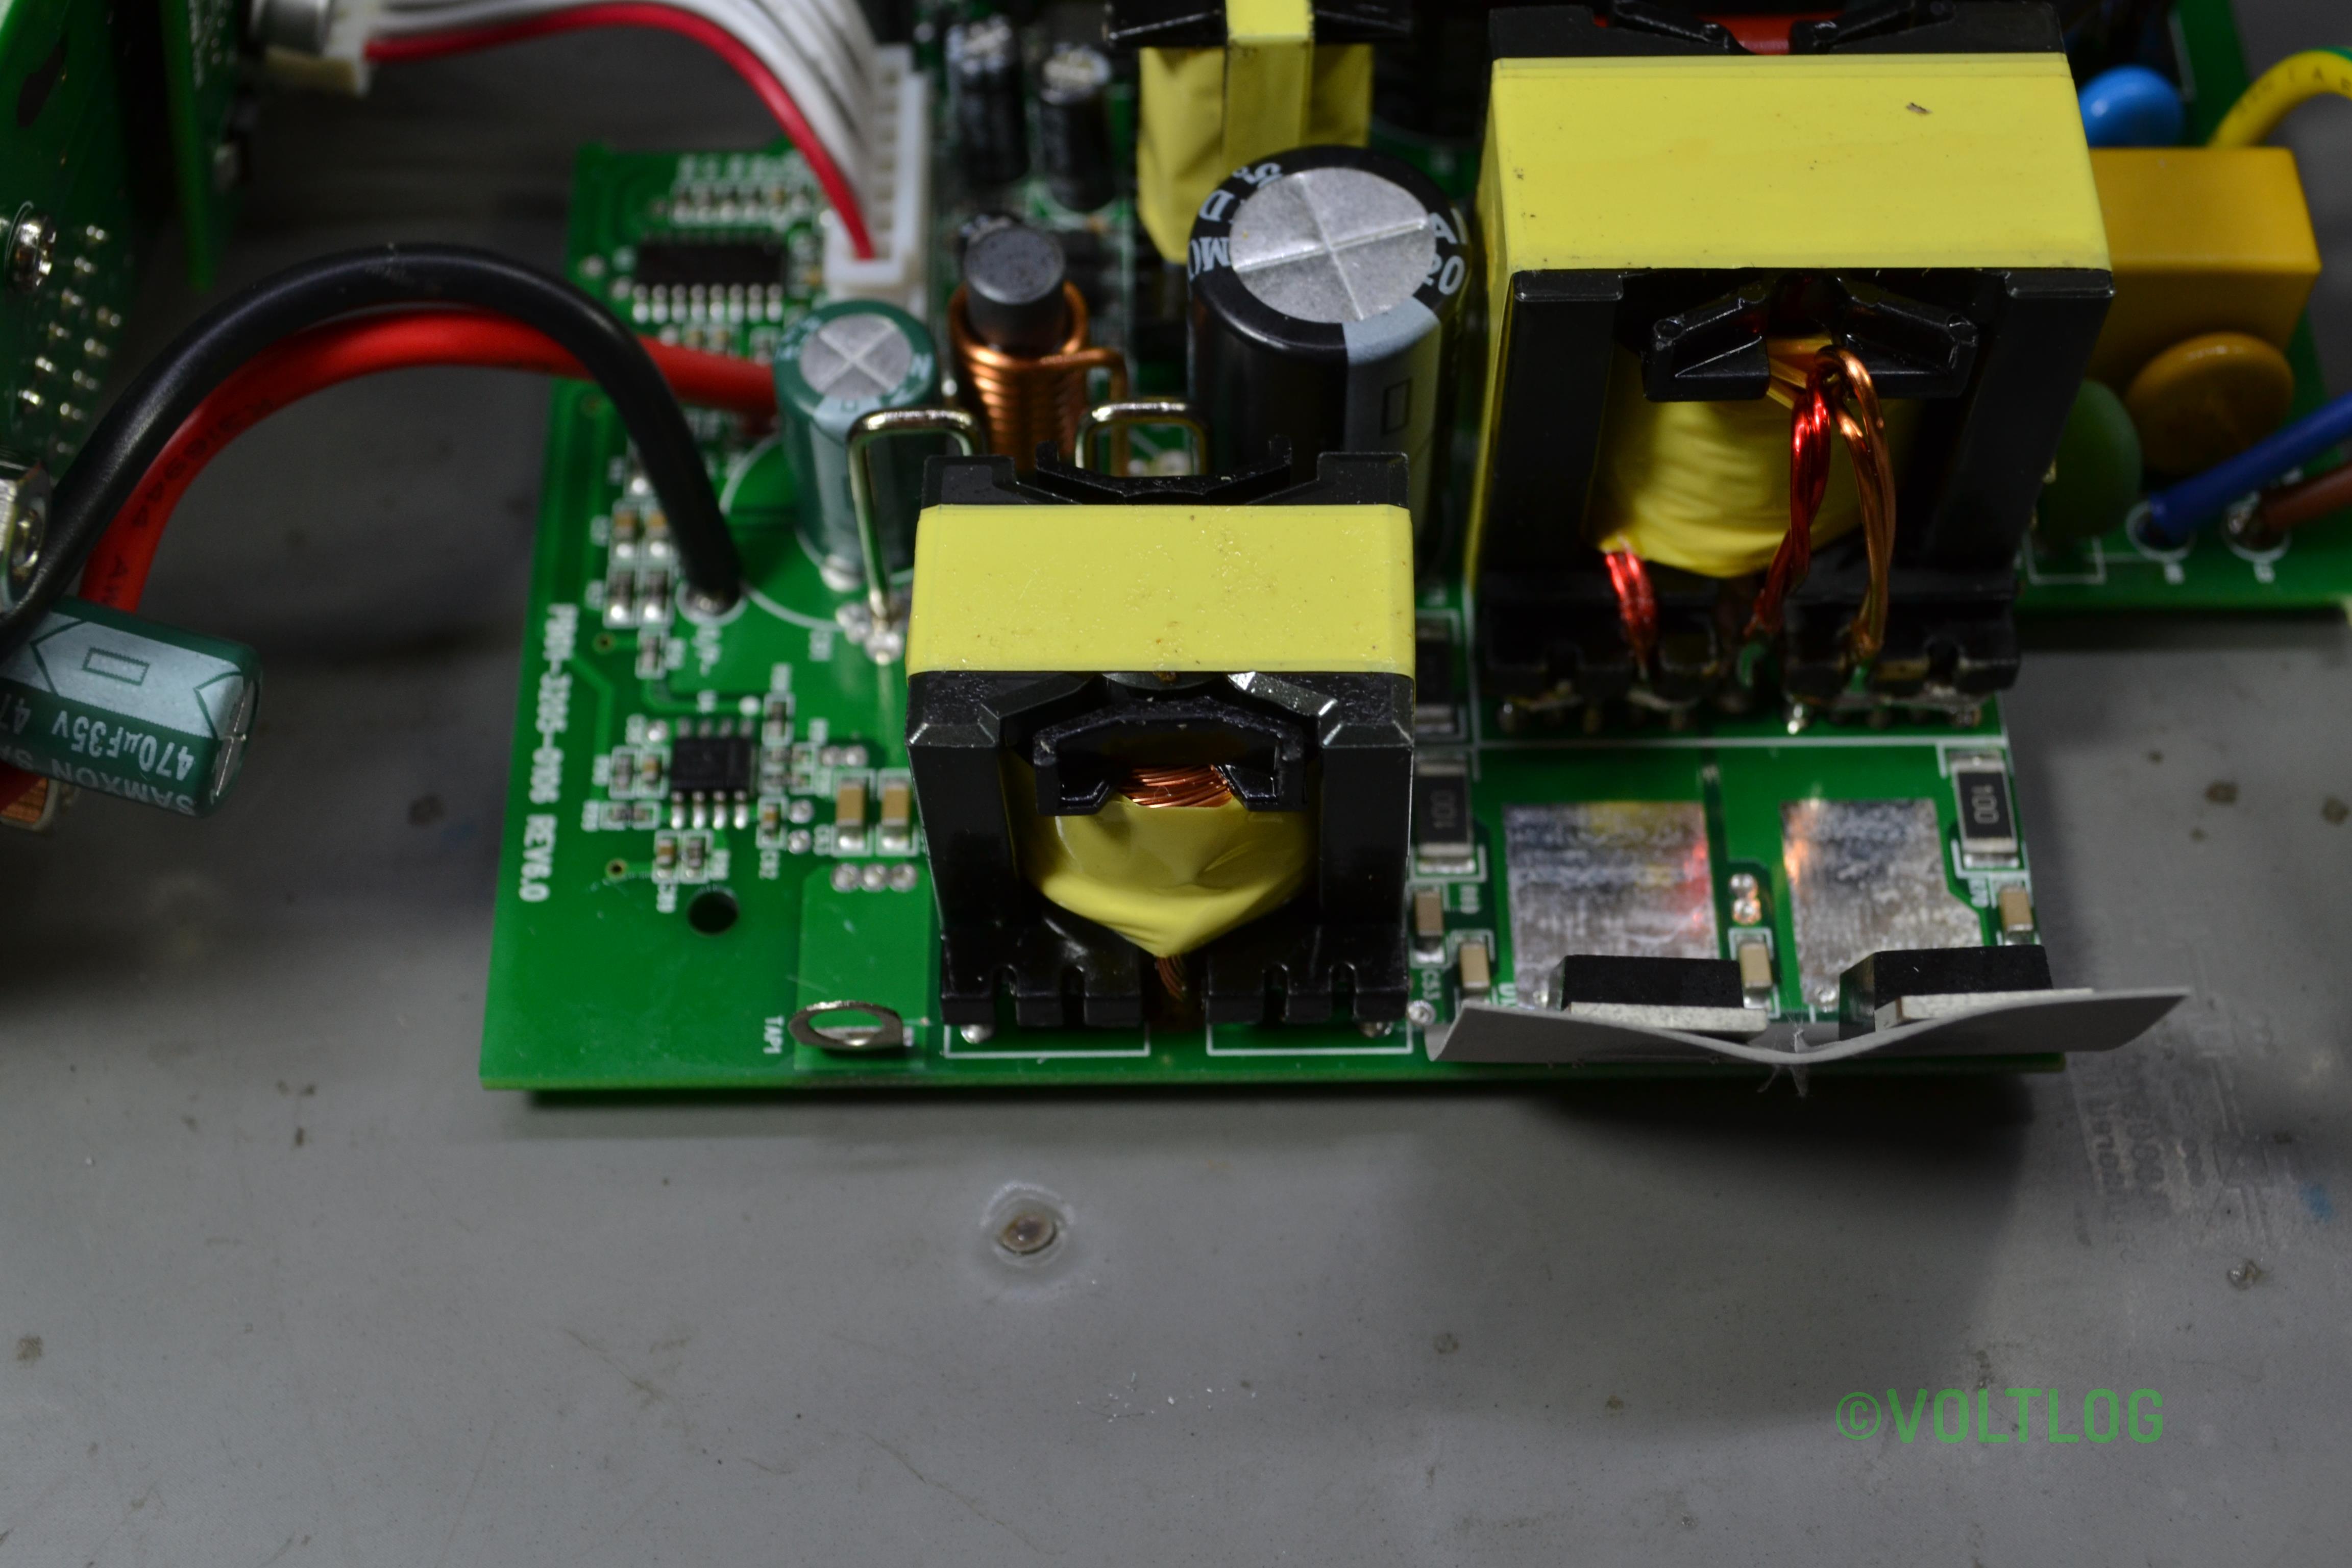
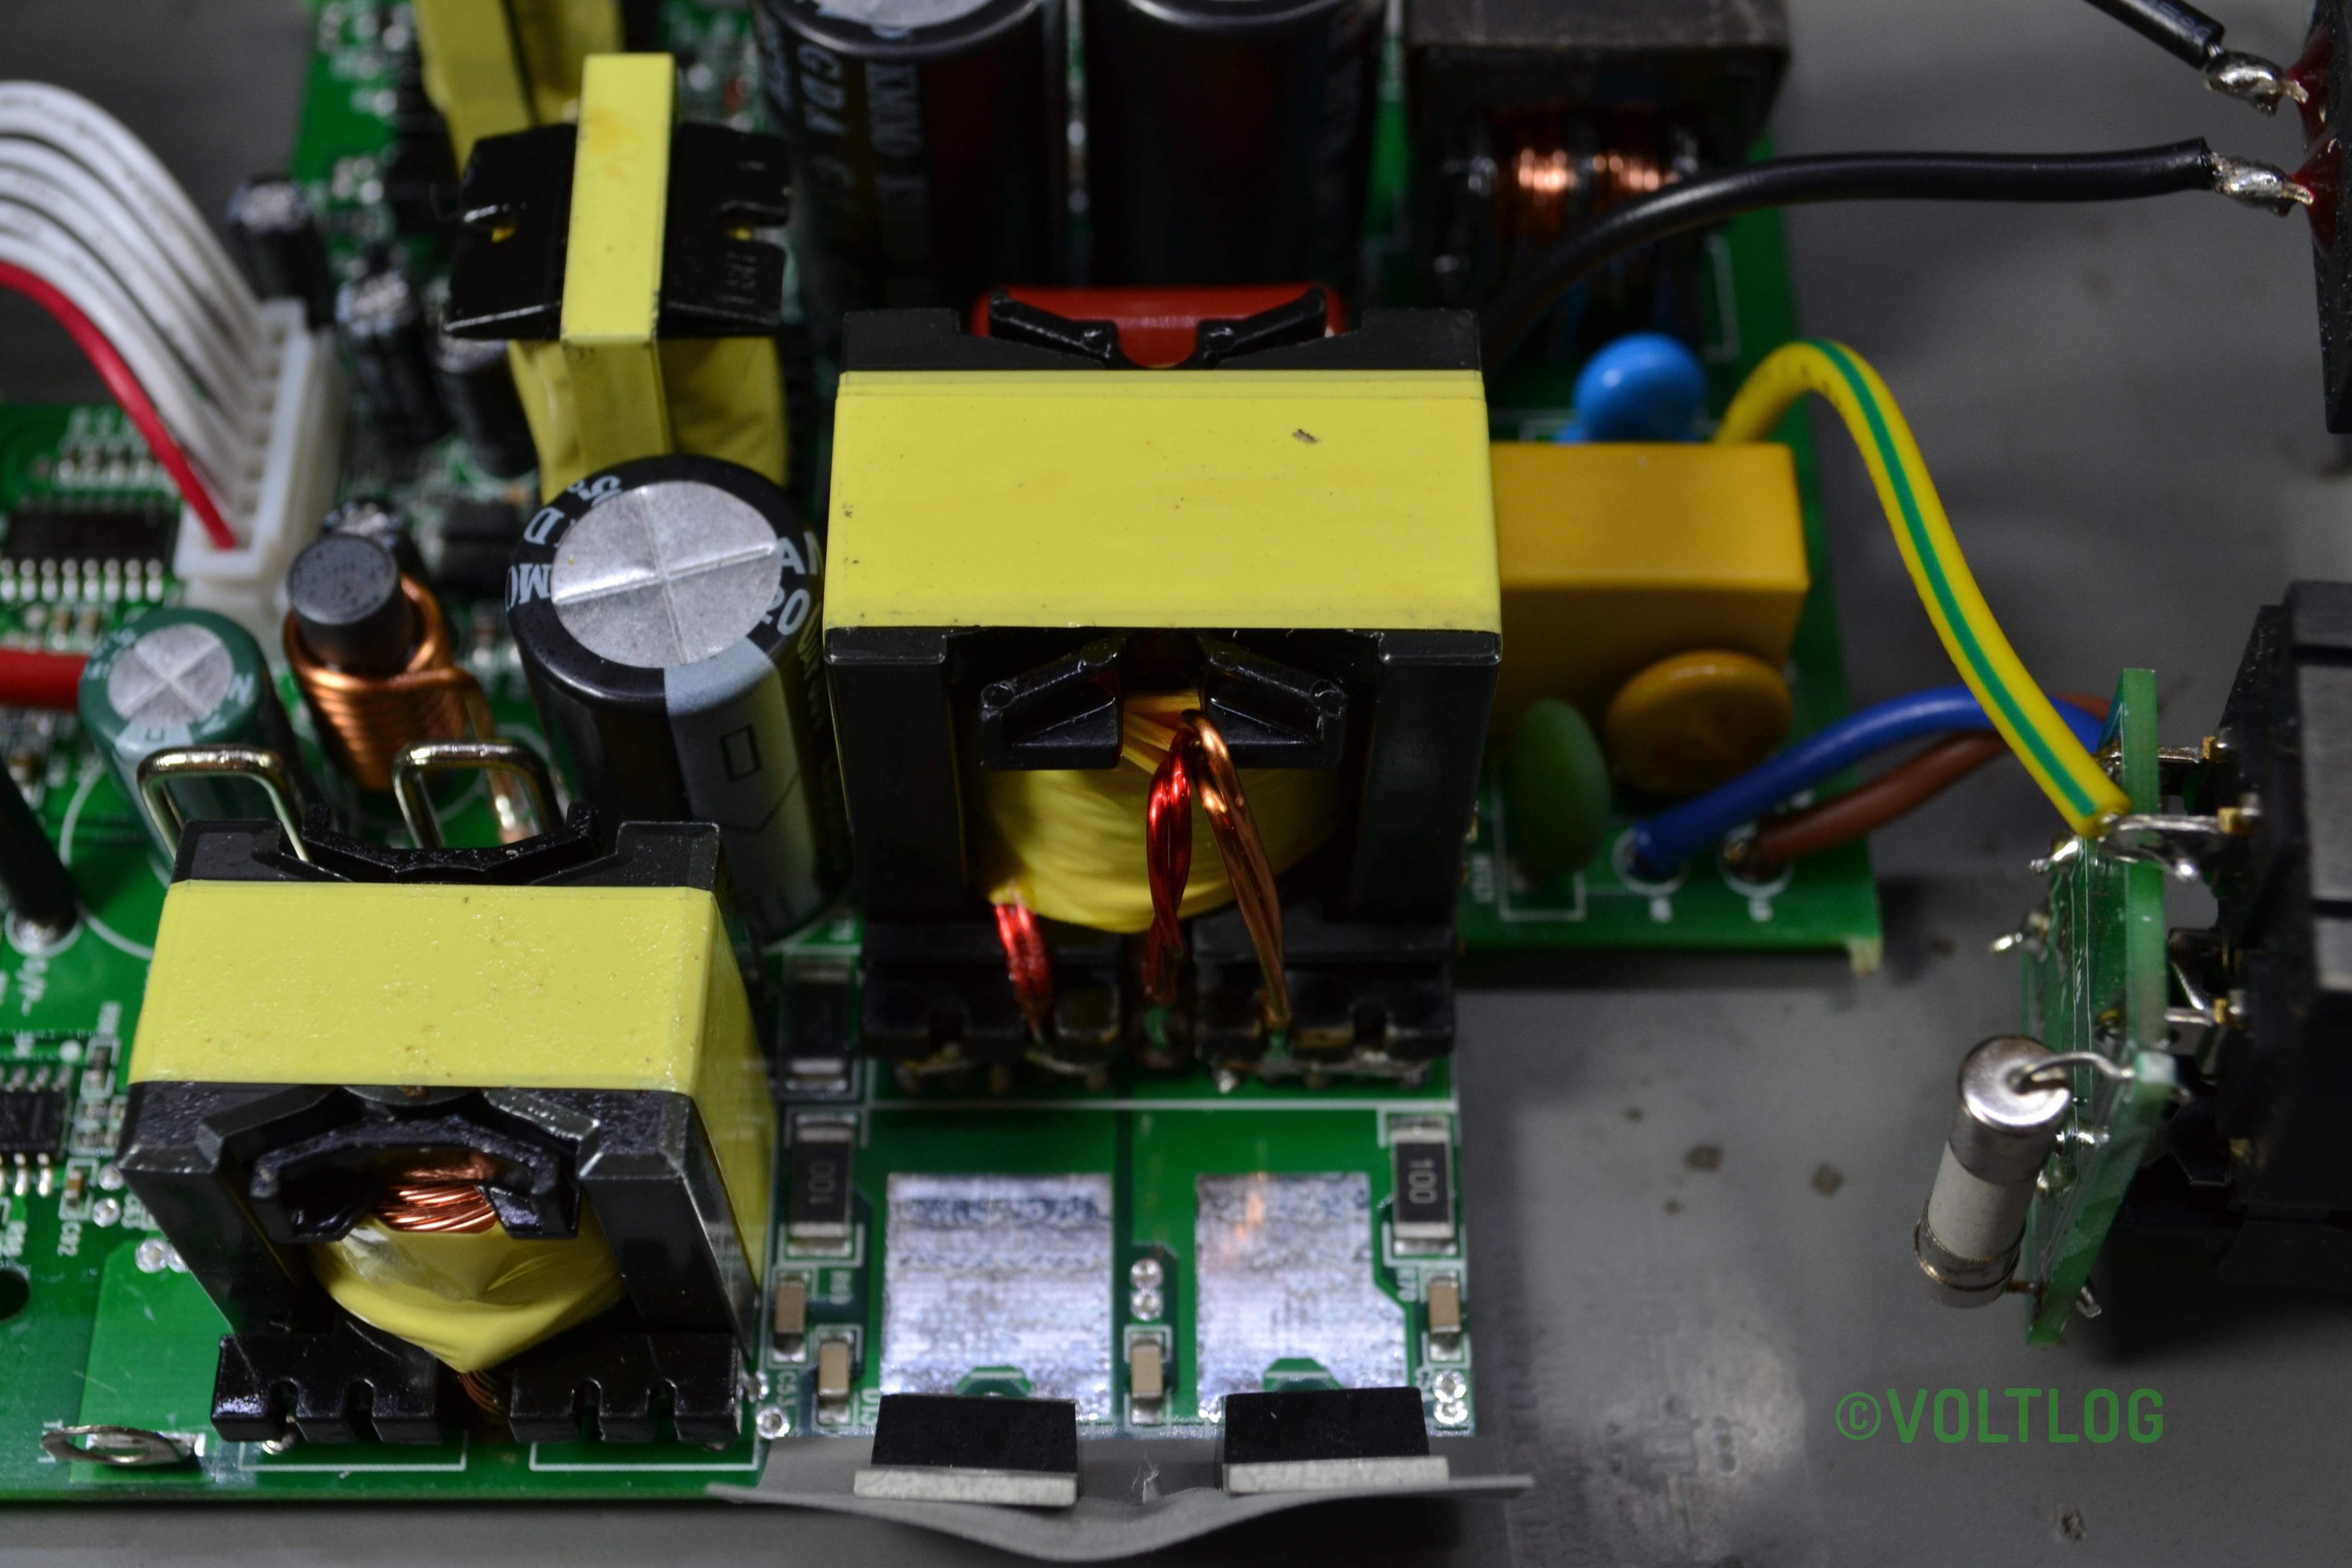
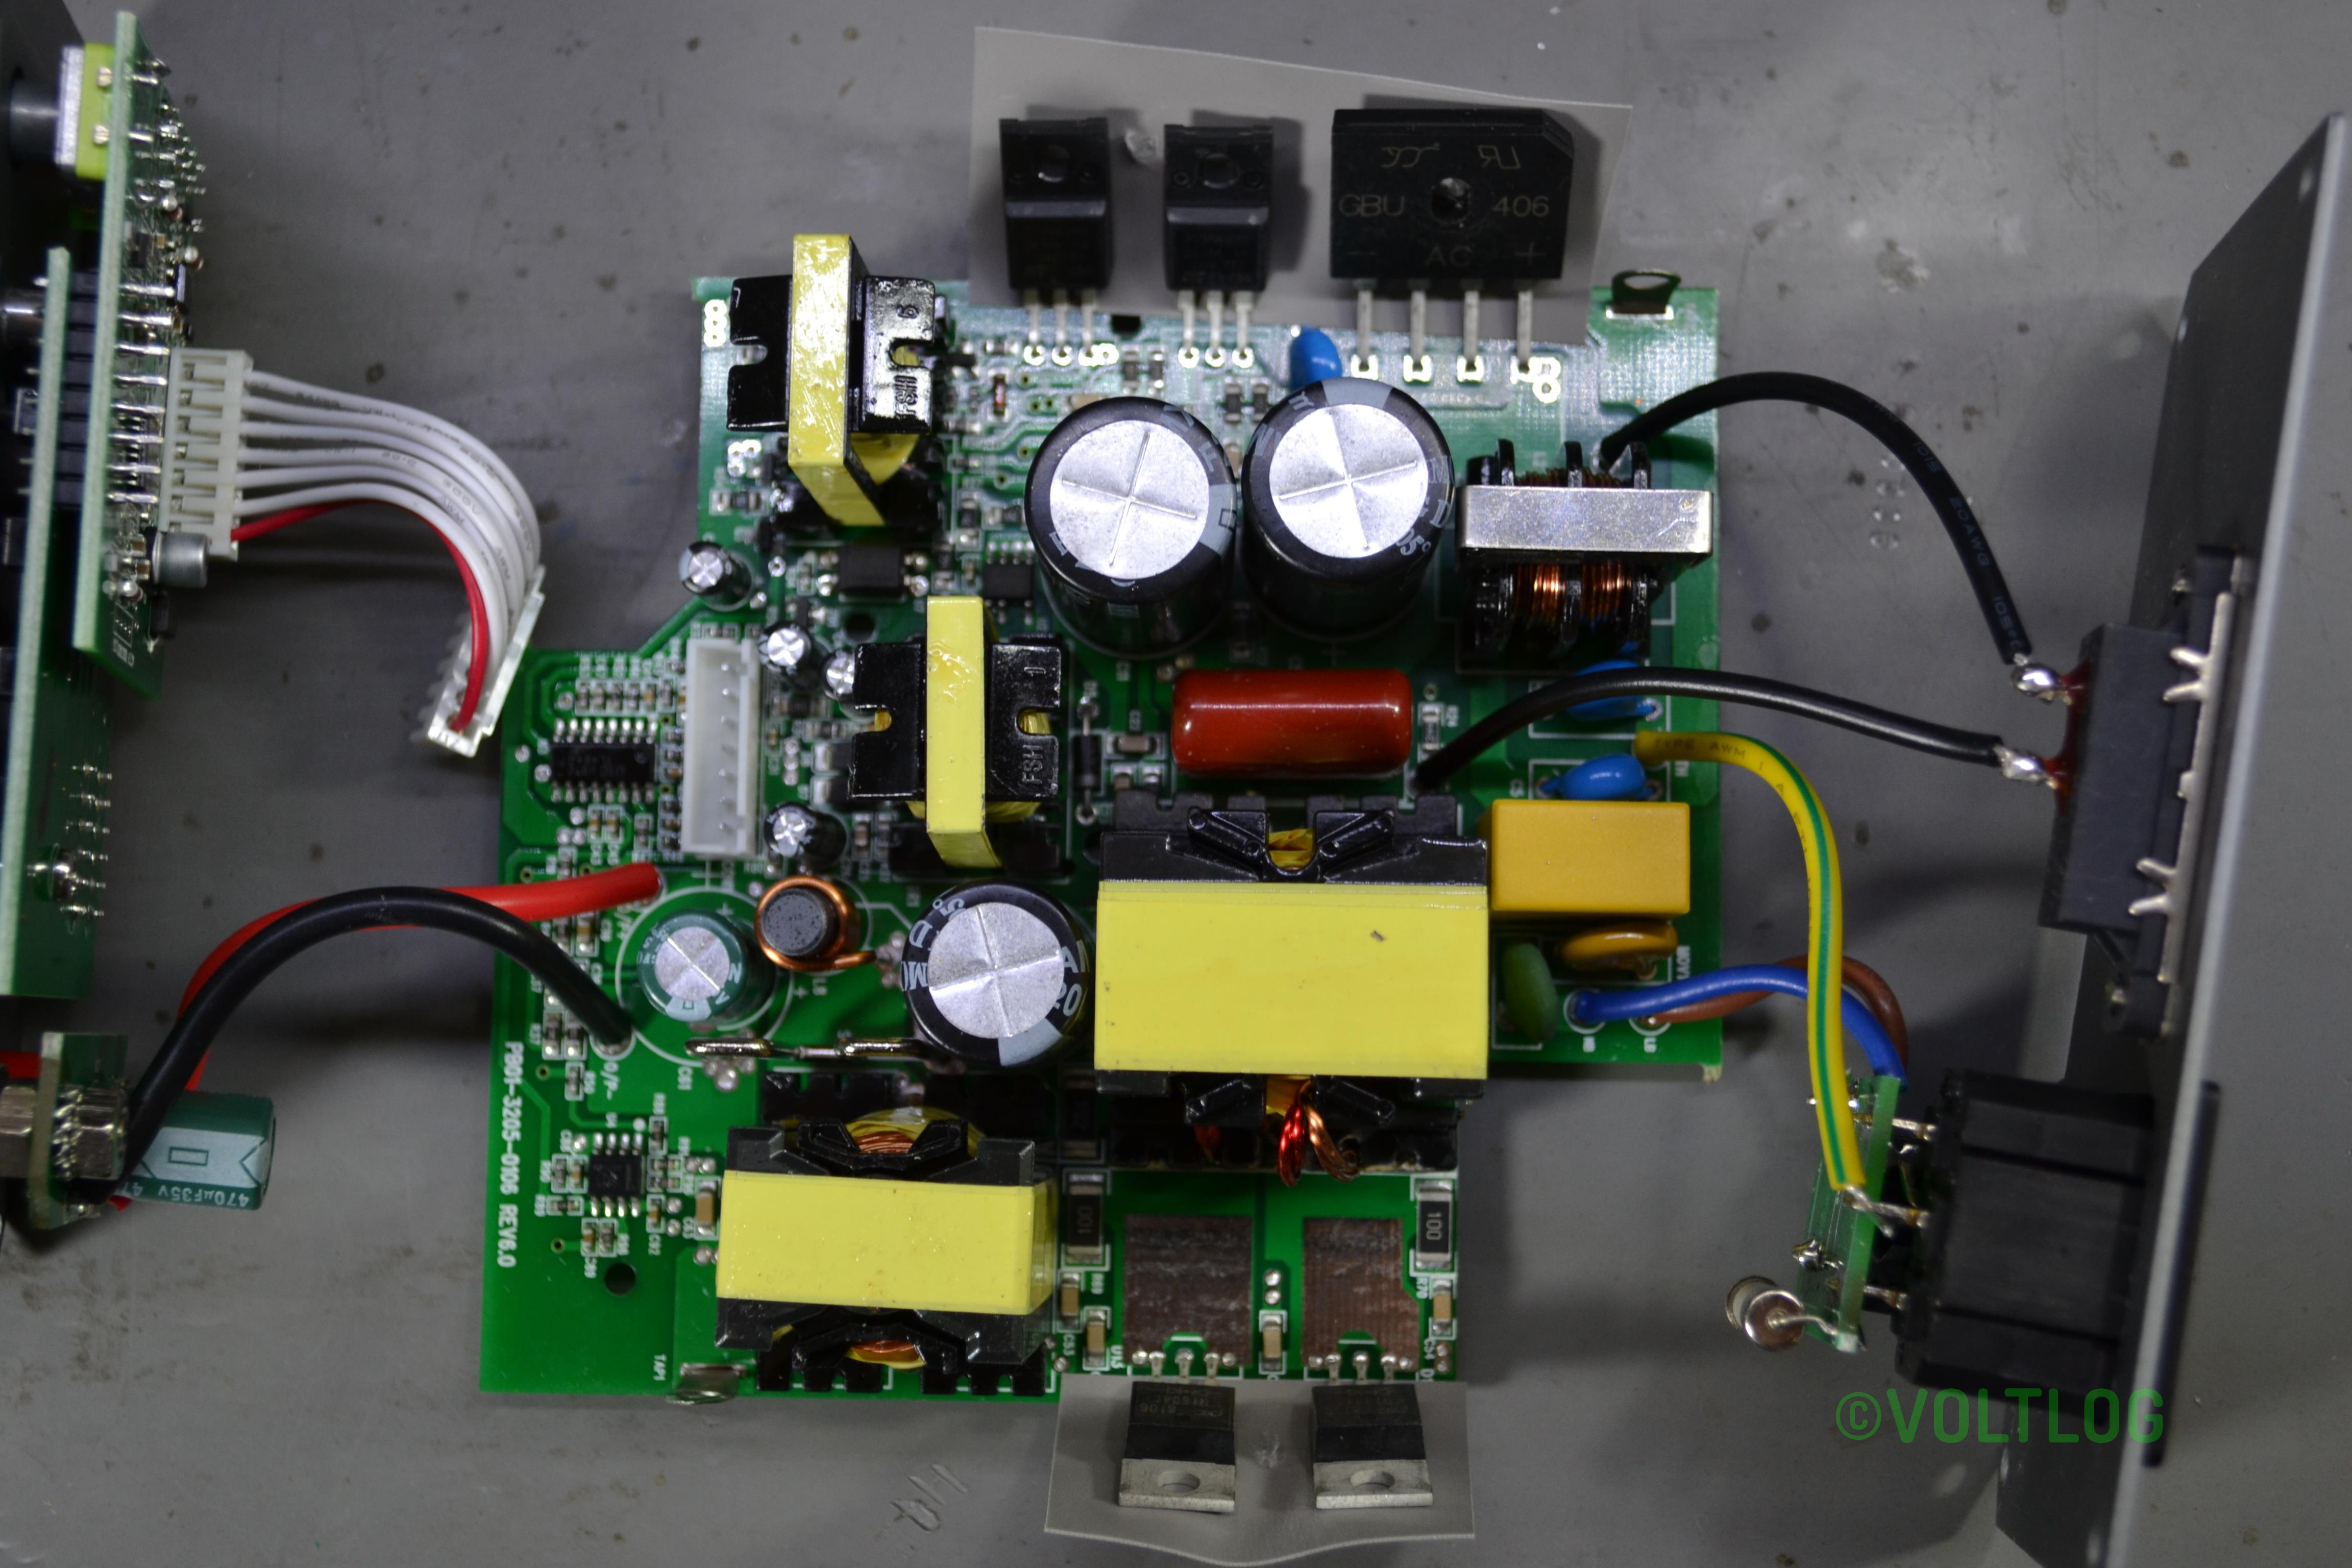
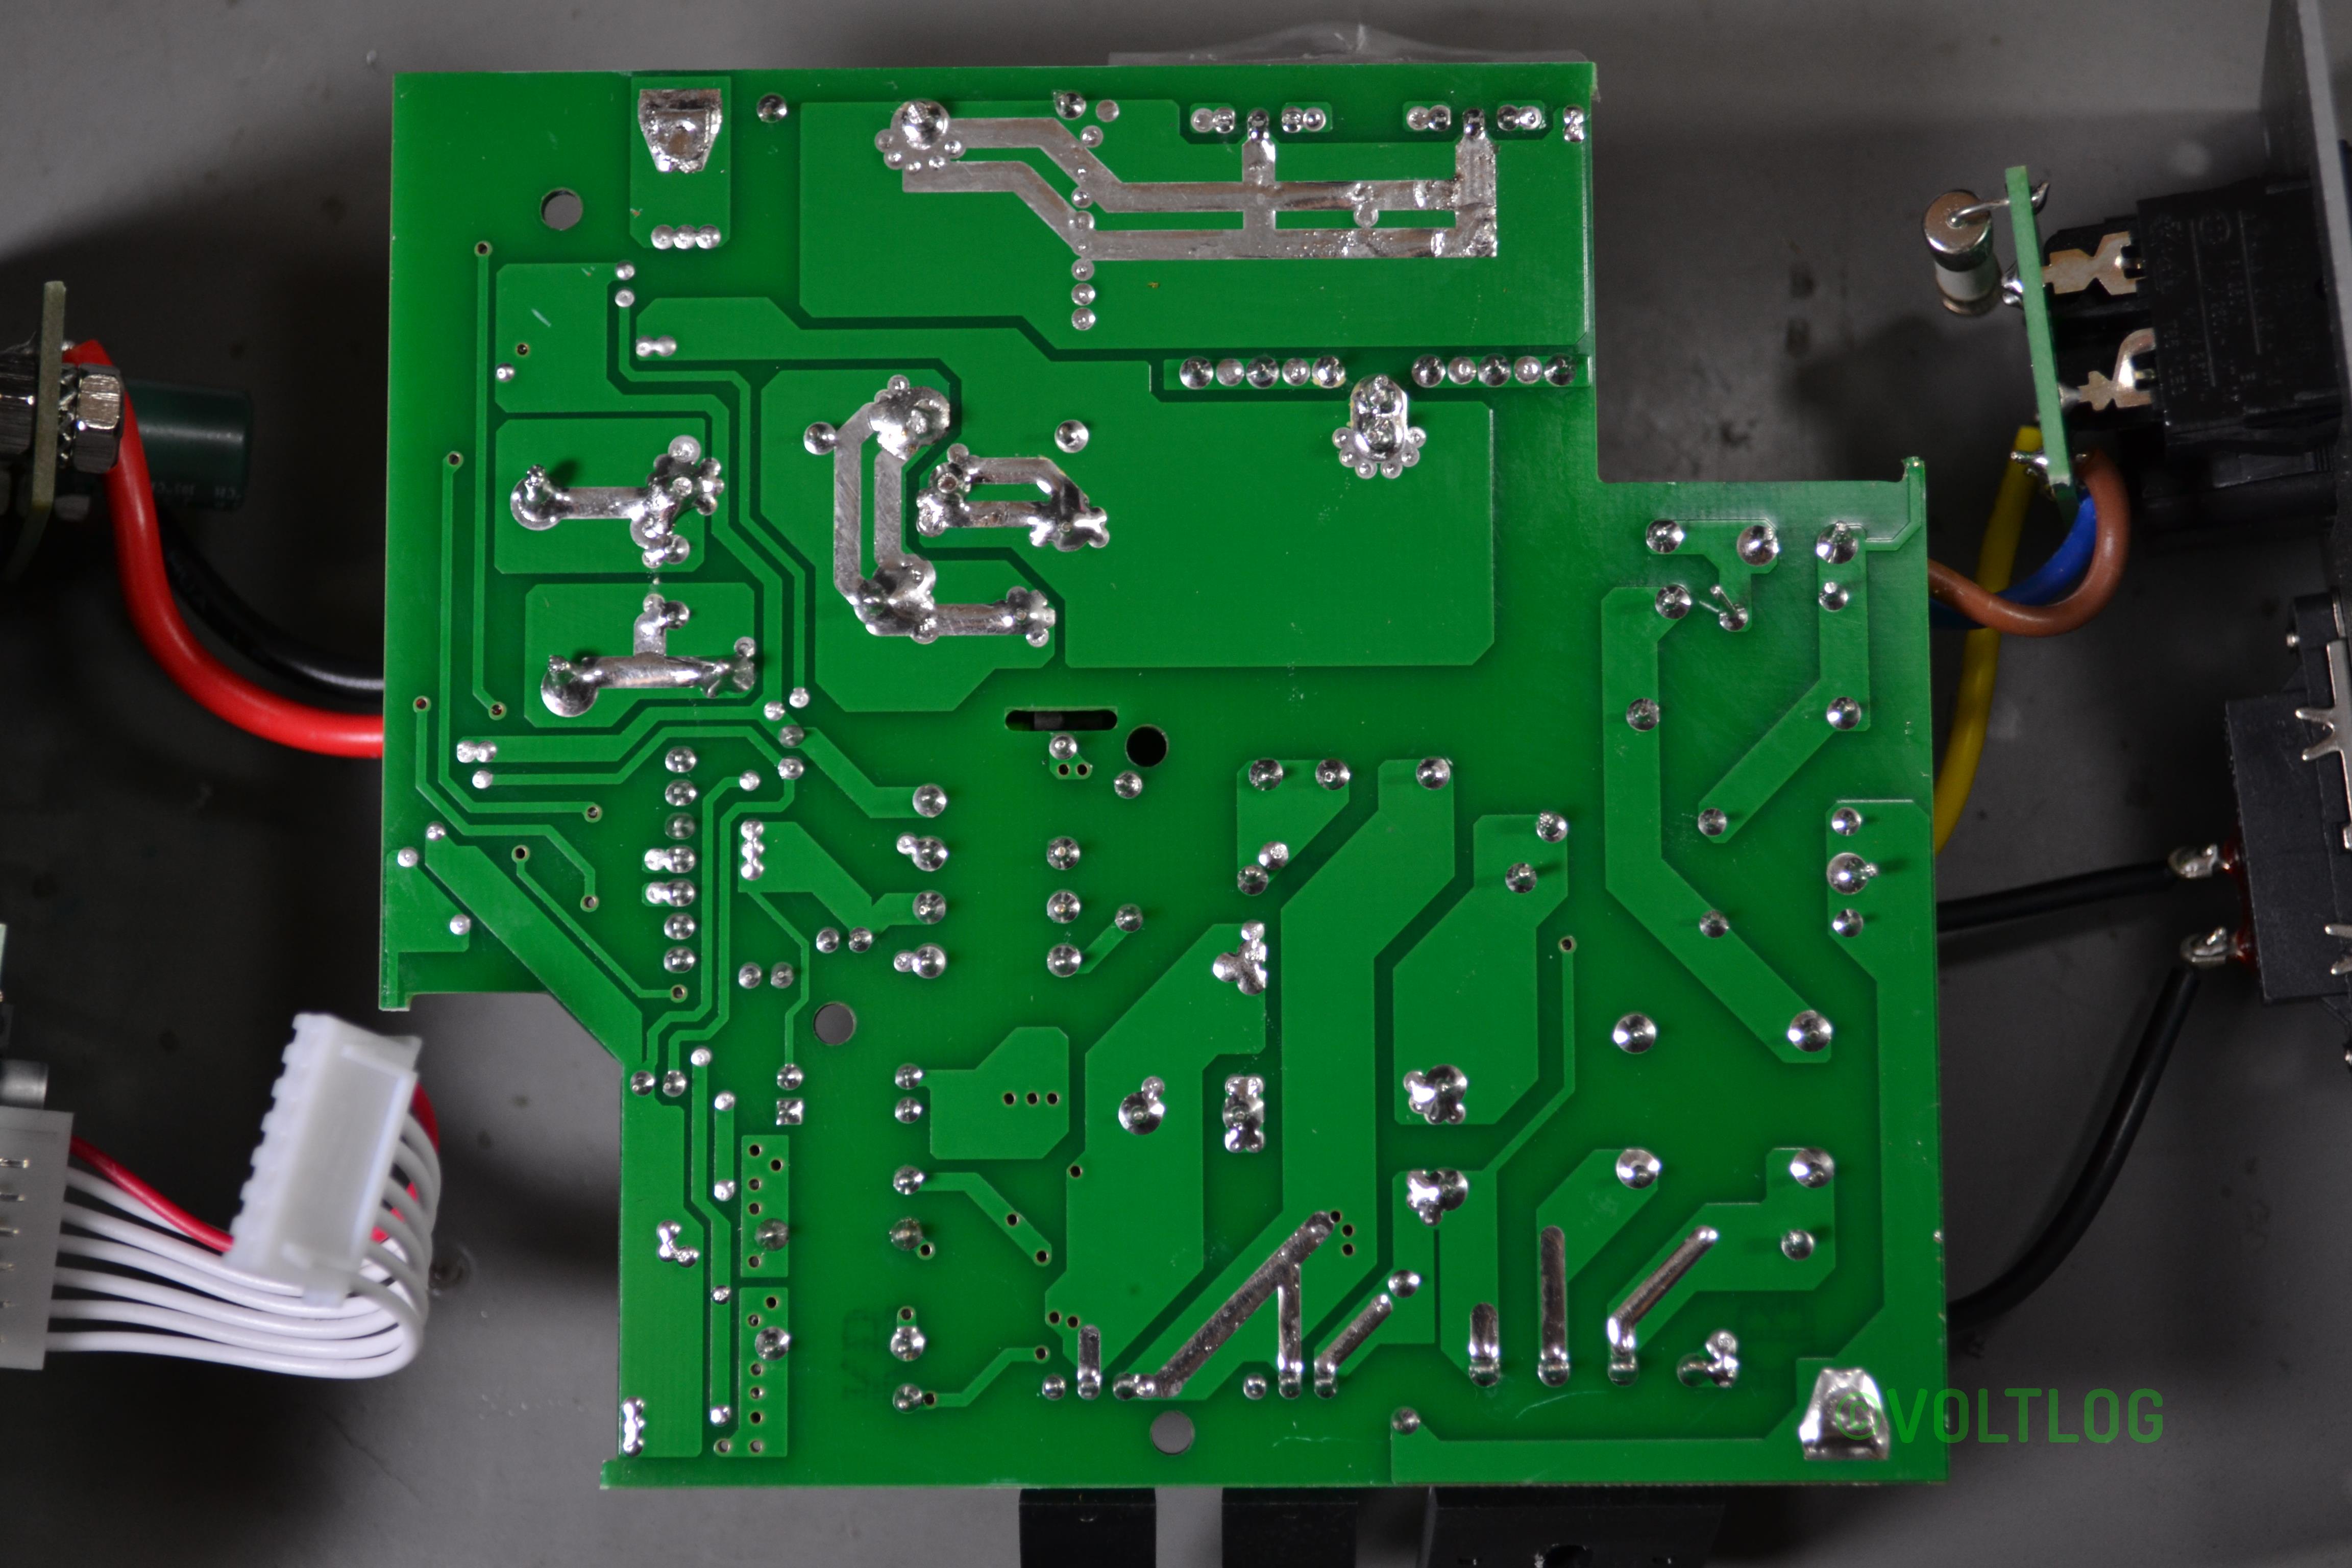
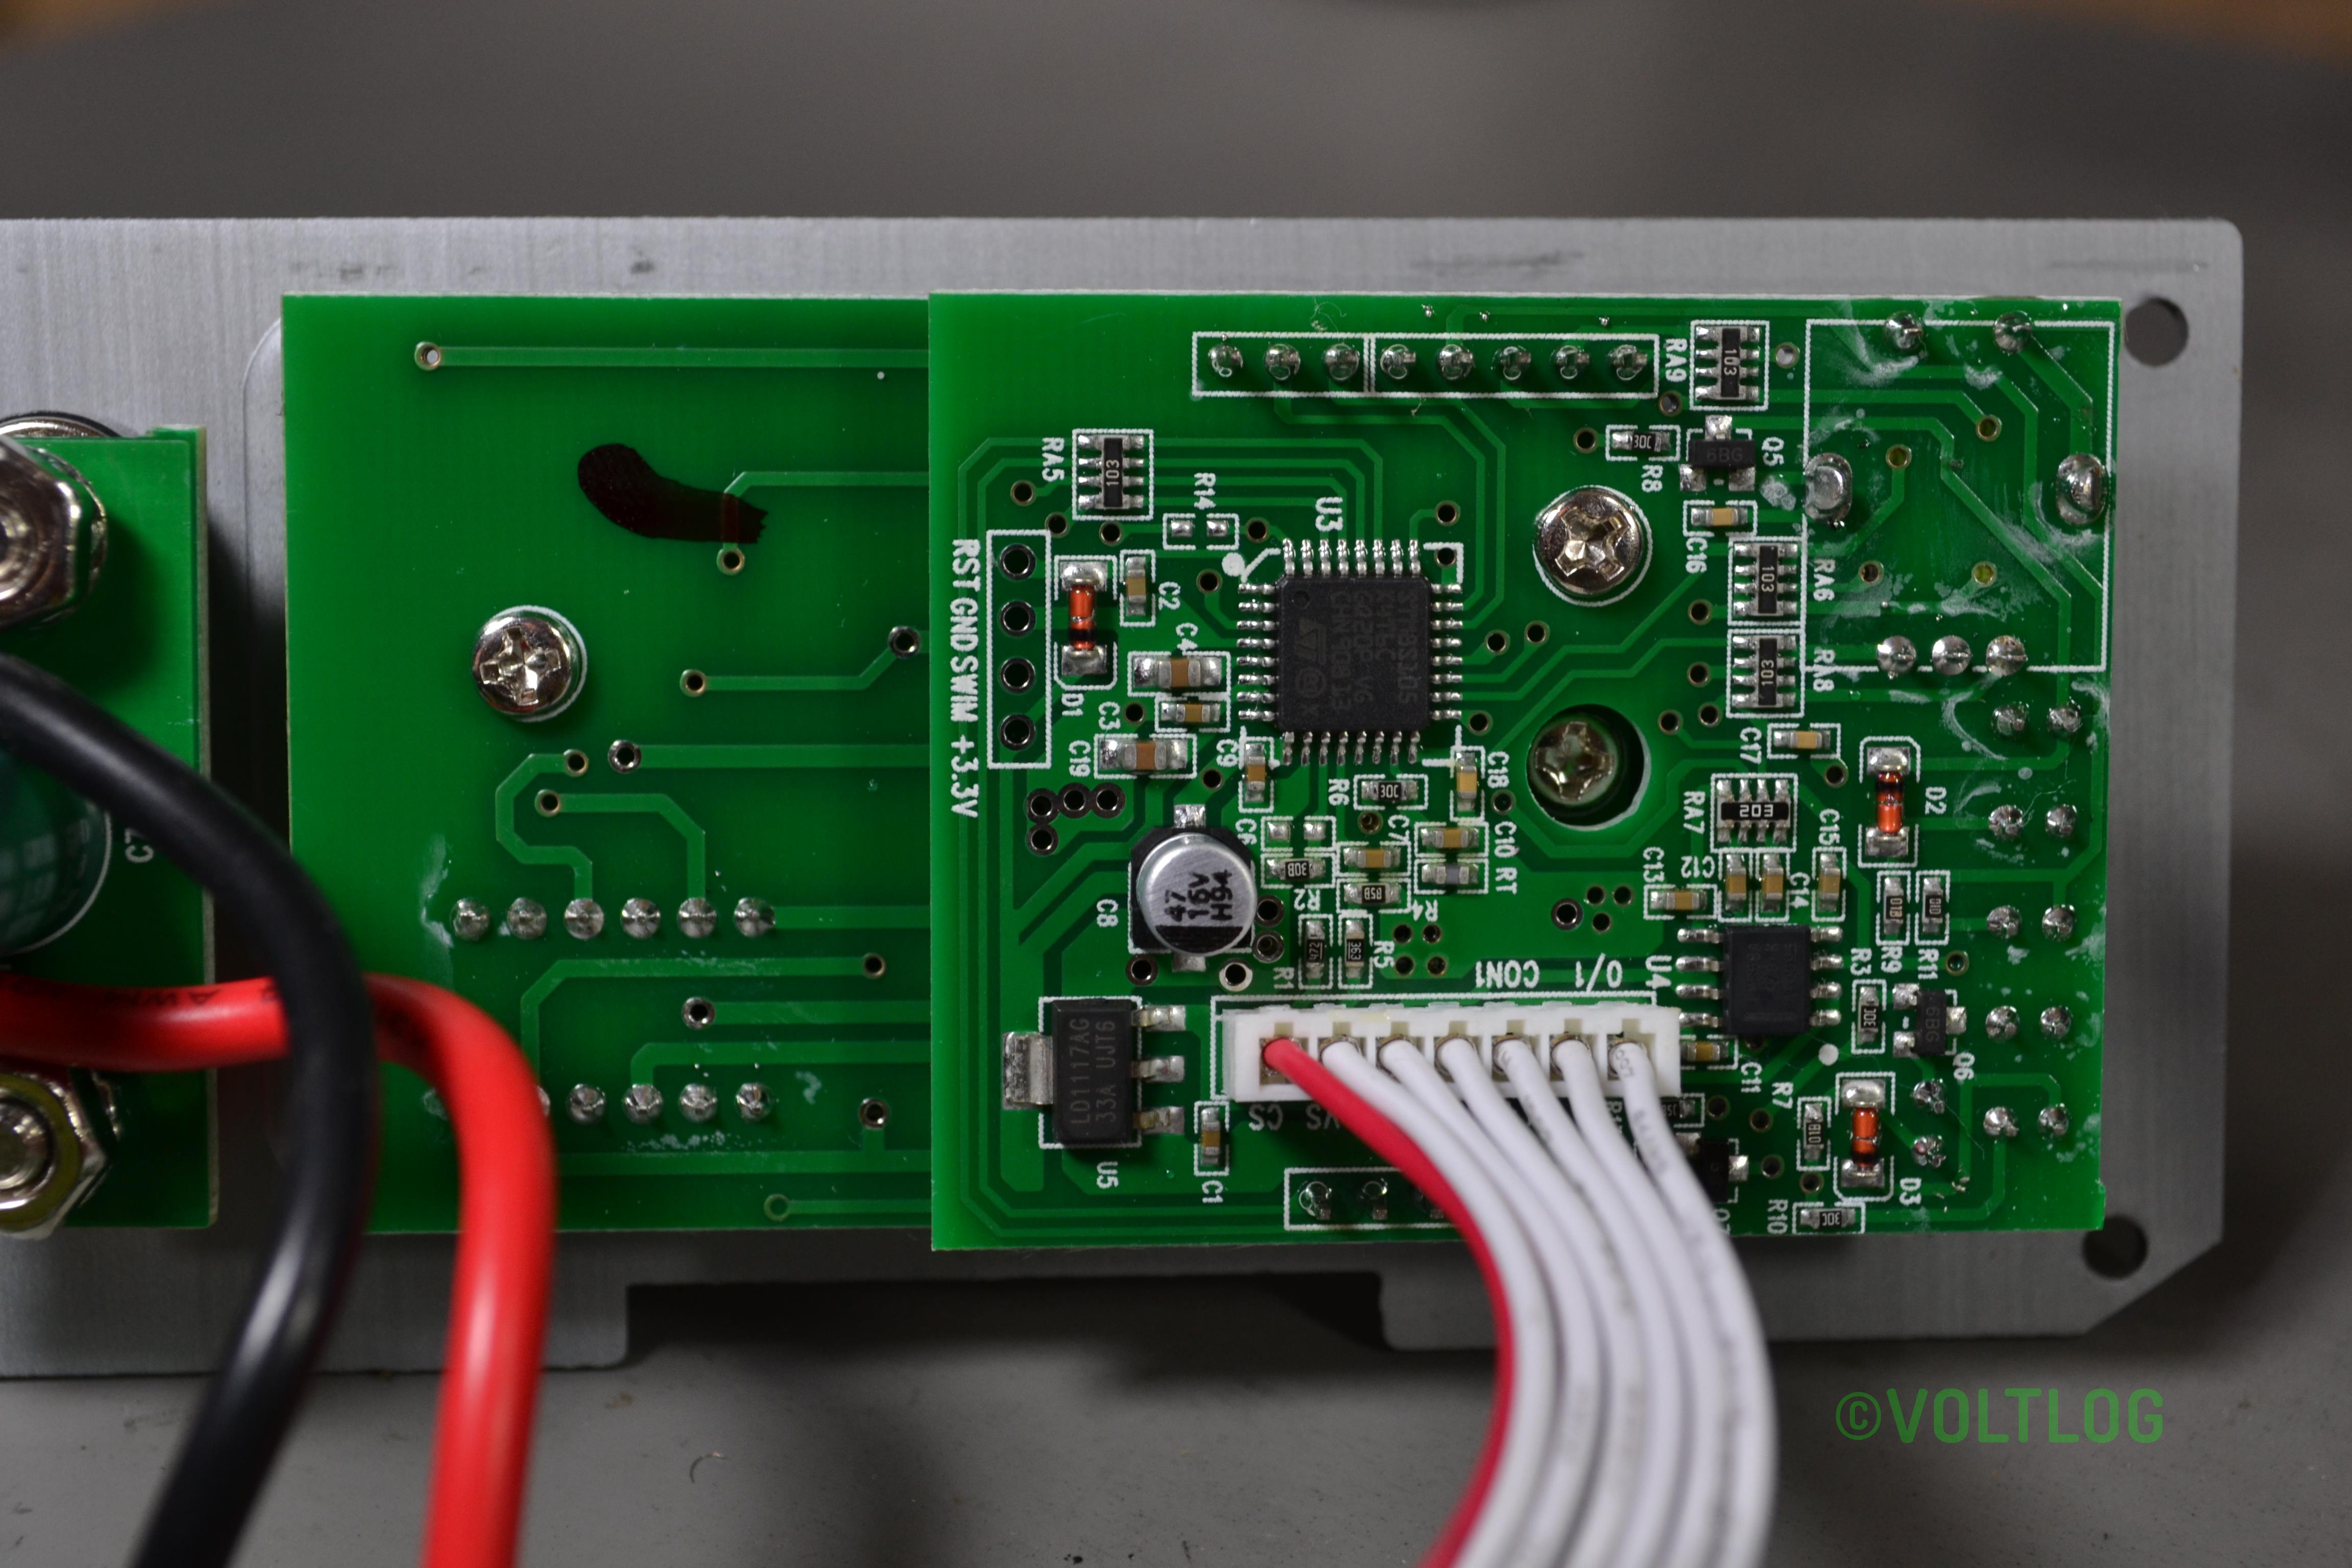
If you would like to checkout the teardown of the Kunkin KP184 click here.

Voltlog #297 – How To Parfocal A Trinocular Microscope

Welcome to a new Voltlog, in this video I’m gonna show you how to parfocal your trinocular microscope, this means getting both the eyepieces and the third camera port in focus at the same time and maintaining them in focus while adjusting through the zoom range of microscope from low to high. 

This is extremely useful if for example you are using the microscope through the eyepieces, soldering on some board and at the same time you are using the camera port for recording or live streaming. Once you do this procedure, the camera and the eyepieces will be synced in focus even as you adjust a different zoom level but with some limitations, as I will show in a moment, these are the result of the camera optics which will limit the effective zoom range in focus.

Now if you are using a 0.5x barlow lens like I do and like most people doing electronics will be using, you need to consider the fact that the working distance is about 16.5cm between the barlow lens and the work surface. So keep that in mind, because the adjustment we will do later will be happening around that working distance.

Voltlog #296 – Microscope Camera Focus Issue Fixed!

Welcome to a new Voltlog, as you may remember in Voltlog #282 I got a new trinocular microscope and then in Voltlog #292 I got a new camera because the one shipped with the microscope had issues. Banggood till this day did not replace the camera which I believe is defective, they kept asking me to try these various settings in the camera menu to improve the brightness but none worked.

Now to get a good image and have both the camera in focus and the eyepieces you will need some kind of reduction, an optical adapter between the camera and the microscope port. So first I got this SZMCTV 0.3X adapter, after reading some reviews who were claiming this will give the best field of view.

After installing this adapter I noticed the field of view was almost the same as through the eyepiece which is great but I couldn’t get it in perfect focus with the limited adjustment available on the adapter and I was getting this tunnel vision which I couldn’t quite explain but it was obviously not what you want to see.

And so I got this newer wide body 0.5 adapter and installed it on my microscope and the problem was solved I could now get my camera into focus at the same time with the eye pieces but with a loss in the field of view due to the 0.5x adapter. Getting the SZMCTV 0.5X adapter would probably also work, that’s a bit cheaper, but I went with the recommendation of getting the newer type of adapter with better optics.

Voltlog #290 – Riden RD6006 Output Noise Using Recommended Power Supply NVVV S-400-60

Welcome to a new Voltlog, this will be a rather short video cause I will only be addressing one short subject regarding the Riden RD6006 ripple noise. In my review of this power supply in Voltlog #284 I did measure the output ripple but that was measured while using a transformer to power the unit. 

That transformer has very little output noise so the results we obtain can be considered best case scenarios but this may vary in practice, especially if you are using the recommended switch mode power supply. The output of that power supply may not be as clean as the one from the transformer so in this video I’m going to measure the output noise with the switch mode power supply installed.

I’m using the recommended NVVV 400W 60V 6.6A rated power supply, this is what RuiDeng officially recommends to use with their power supply kit. In Voltlog 284 part 3 I took a look inside this power supply so I will link that video on screen if you want to check it out.

Voltlog #284 – Riden RD6006 Power Supply Review

Welcome to a new Voltlog, if you’ve been watching the channel for a while you might know I’m a fan of the gopher power supply units, I think they are great value for money, they’re simple and they have good specs, in fact I reviewed their latest revision in Voltlog #255 and it had very low noise at the output, even though it is a switch mode power supply. They’re pretty compact, they don’t take up much space on the bench so what’s there not to like about these?

But in recent years there’s been another company which has slowly built-up a name among hobbyists due to their really low priced power supply modules, the name of the company is RuiDeng and they’ve been selling these compact switch mode power supply modules for $20 to $30 for years. They were not great specs, the quality was not great, you needed an external power supply unit but they had a bunch of functionality built into that color TFT display and they were cheap so everyone gave them a try

Now RuiDeng has developed and released a new model RD6006 which resembles a real bench power supply. It has a bigger front panel and it comes with a separate enclosure and power supply unit which are optional.

Voltlog #255 – Gophert NPS-1601 Review (possibly the best power supply in this price range)

Welcome to a new Voltlog, those who have been with me since the beginning of this channel, may know the first video I ever released, Voltlog #1 was a review of a switch mode bench power supply from Gopher Technology. It was the CPS-3205C and it was a great little unit, it has served me well over the years and I still have it.

At that time I complained about the fact that the unit has the output jacks on the back which is not really convenient for bench use. There were also other issues mentioned while measuring the performance of the power supply,  I will link that video on screen if you want to watch it but the video, audio and editing quality are lower than what you’re seeing today.

Gophert made some improvements to the original design and have now released a newer version of that power supply, it has a new model number it’s NPS-1601 but it’s the same range of 0-32V and 0-5A. There are other models with different ranges but this is what would correspond to the CPS3205 I reviewed years ago.

They have made a bunch of changes on the front panel, the most important one is they moved the output jacks to the front panel so now it’s easier to connect the output of this power supply but they are still not standard spacing so you can’t connect one of these adapters with banana jacks. They have also redesigned the front panel completely, they are still using 7 segment displays but now they also have a wattage display which can be switched on temporarily in place of the amps display, you press the watts button and it will show watts measurement for about 3 seconds before reverting to amps display.

The switch for A/V adjustment is now tactile instead of a sliding switch but the rest has stayed the same. I like this redesigned front panel I just wished they used a lighter color for the text, because for example there are some markings which are barely visible next to the LEDs.

Here is a set of pictures I captured during the teardown:

Voltlog #253 – Aneng V01A Multimeter Review & Teardown

Welcome to a new Voltlog, today it’s a multimeter review because we haven’t done one in a while and here I have the Smart Digital Multimeter which sounds like a generic name, no obvious branding on the box but granted it is featuring the multimeter on the box, it’s a color image which is not often seen on these cheap meters. On the back, the meter is shown in full black holster and we get a model number sticker, AN-V01 so this probably indicates the Aneng brand.

We’ve looked at Aneng multimeters in the past in Voltlog #114 and others and I’m gonna say this again, Aneng does not make multimeters, Aneng is just a company that rebrands existing multimeters made by other companies.

Voltlog #250 – Replacing Bad 4mm Banana Plugs With High Quality Hirschmann and Staubli

In this video I replace some of my old crappy 4mm banana connectors with some new Hirschmann and Staubli, high quality connectors. These should be more reliable and provide a low resistance connection between my test gear allowing me to pass high currents without any issue.

Voltlog #248 – Atorch Q7 USB Meter/Load With QI Wireless Charging

So this load is built with 3 active pcb’s as well as a fourth passive one as a front panel. They are joined with these brass standoffs and I think the standoffs act as circuit paths as well because I see no wires between the different levels. In order to get the alignment right during assembly the designer of these pcbs, made these corners rounded while these ones are diagonally cut and you can see these features along an entire side. This is a neat solution overall because it saves cost and as long as the screws are tight these should provide adequate connection.

Voltlog #211 – Joulescope DC Energy Analyzer Review & Teardown

Welcome to a new voltlog, today I’m excited because we’re going to take a look at an awesome piece of instrumentation. I’ve received a pre-production demo unit of the Joulescope DC Energy Analyzer.

The joulescope is a low cost precision dc energy analyser which is currently on kickstarter so check the links in the description of the video for the kickstarter campaign because it has a massive discount from the retail price. The joulescope has circuitry for measuring voltage and current, from which it can calculate power and then it can integrate power over time to calculate energy. The current measurement range is from 10A al the way down to 1nA, that’s a huge dynamic range which makes it very useful if you plan to measure the energy consumption of a device that has mixed behavior for example an esp32 that will wake up, do some activity and then go back to deep sleep.

The joulescope works with a software companion that has a multimeter view and an oscilloscope view which I find very useful because it will allow you to time correlate measurements of voltage and current. That can be extremely useful when determining the energy usage of your device.